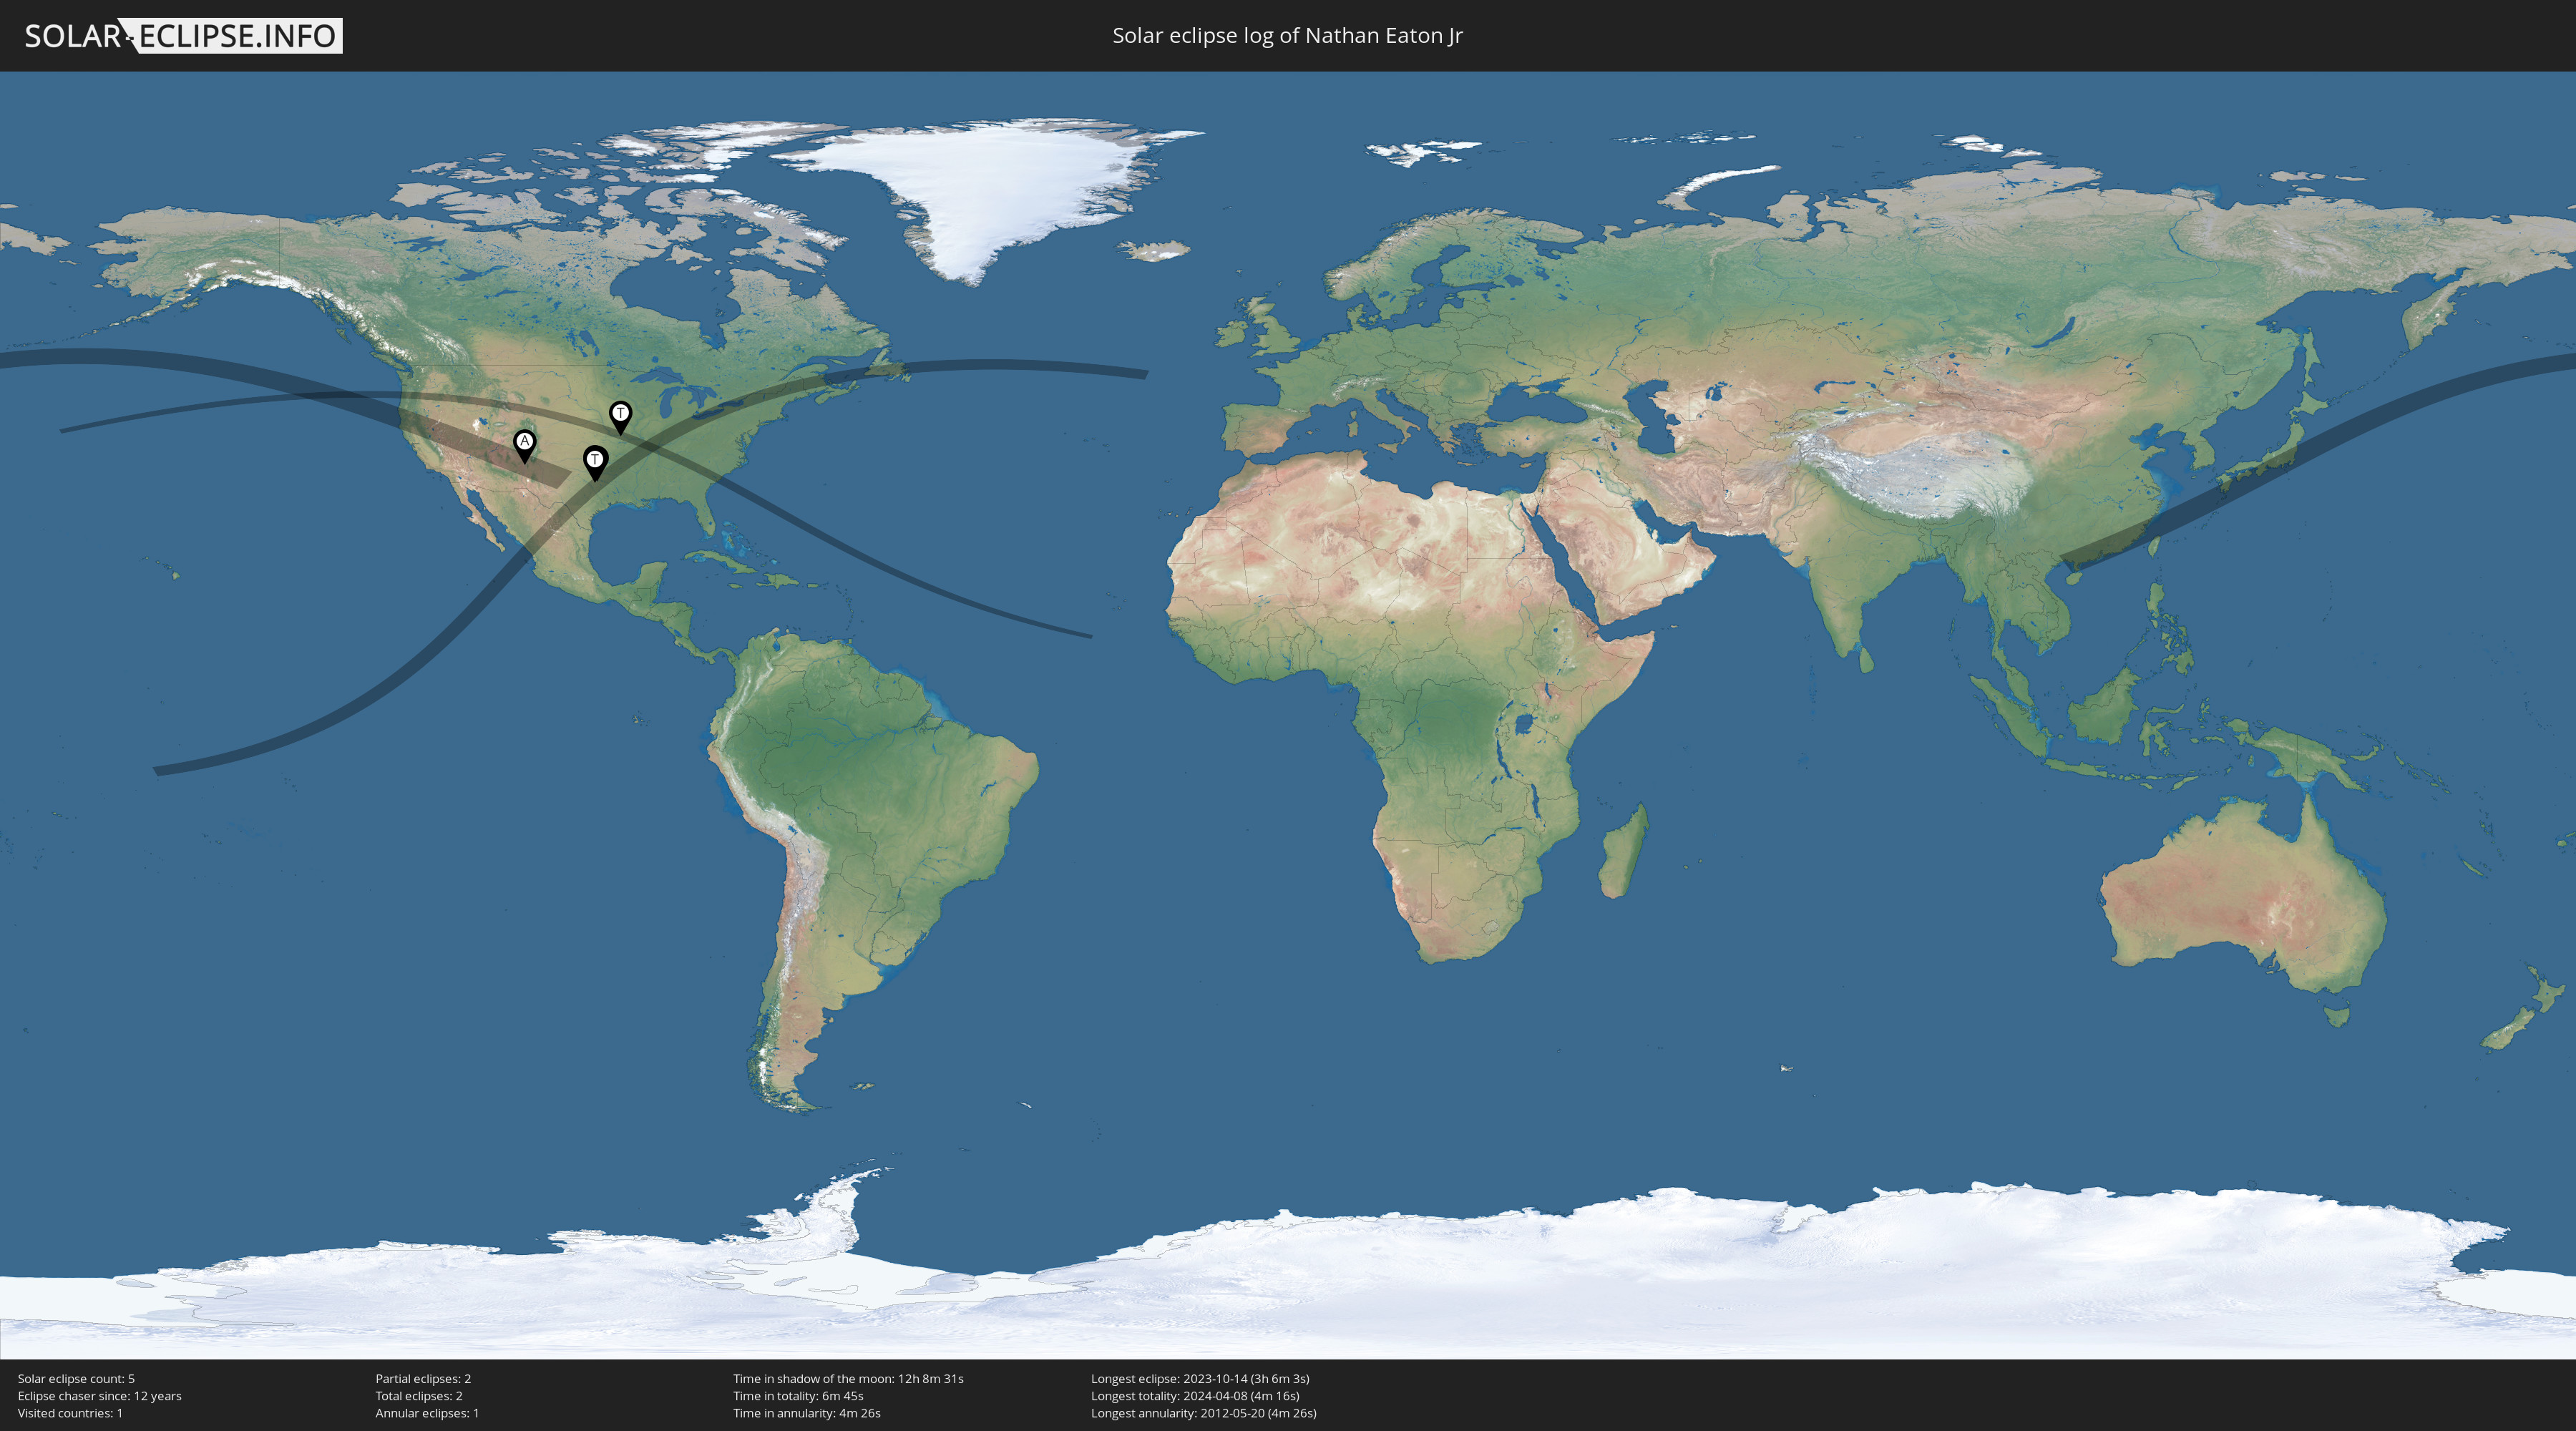
Sunday, October 15, 2023

October 14th Annular Eclipse as Viewed From Dallas

Did you get a chance to see the eclipse yesterday? Even though it was only a partial eclipse for us here in Dallas, Texas, it was still spectacular!

As lots of folks at the State Fair of Texas found, it's pretty amazing how easy it is to see what's going on (watching with appropriate eye protection, of course). Given that it isn't safe to look directly at the Sun and we may only even try during an eclipse, it's easy to forget that the Sun is about the same size in the sky as the Moon. That, of course, is why a total solar eclipse like the one next April is even possible. But it also means that putting on a pair of eclipse glasses and looking up yesterday during the eclipse, the piece of the Sun blocked out by the Moon was clearly obvious even without magnification. What about the view through a telescope? 

Here is a view from about an hour into the eclipse taken with my equipment which has an effective focal length of 714mm, resulting in a 12.38X view. At this level of magnification, besides the impact of the Moon being in the way you can also make out some of the many active sunspots. Click on the image to see full-size.


Seeing a point in time view of the eclipse is great but to show the changes over the course of the full eclipse, I put together this view containing a subset of all the images I shot to create the eclipse timelapse of my earlier post. These are each about a half-hour apart. 

When you click on this image to see it full-size, you'll also see another version labeled with the times throughout the eclipse when these were taken. 


Saturday, October 14, 2023

A Solar Eclipse at the State Fair of Texas

While my equipment at home was running on automatic, capturing images for a timelapse of the solar eclipse today (see my last post), we were at Fair Park in Dallas for the State Fair of Texas. Our granddaughter, Harper, was showing one of her rabbits in the stock show. Rabbits have been her first breed to manage and show since joining FFA but this was our first opportunity to see Harper showing her bunnies. 

If you know anything about showing at a stock show, it's a lot of hurry-up-and-wait. It turned out that judging for Harper's group wasn't until late afternoon. With all that time free, I wandered around the fair grounds checking out the eclipse and checking out people checking out the eclipse. Thanks to groups like the Texas Astronomical Society of Dallas handing out eclipse glasses for free, lots of folks were watching it. And doing so safely!

Of course, it wouldn't have been a trip to the fair without having a Fletcher's corny dog and a funnel cake! Have you been to the fair, yet? There's still time!

Here are views from the day. As always, click on an image to see full-size. Enjoy!


Folks being safe watching the eclipse with
appropriate eye protection. 

Big Tex holding up the Sun

Big Tex and the solar eclipse viewed through
eclipse glasses

Crescent shadows from tree leaves adorn a
Fair Park coupon booth during mid-eclipse


Congrats to Harper and Coconut!

October 14th, 2023 Annular Eclipse Timelapse


Unable to make it to a spot on the path of the annular eclipse today to view the Ring of Fire, I captured this timelapse of the partial eclipse view from my backyard. 

What's great about successfully capturing this eclipse that I wasn't even home! Since our granddaughter Harper was showing her rabbit at the State Fair of Texas stock show today, I had the equipment set up to run automatically. Months of preparation and practice paid off! BTW, more to come on the State Fair....

The shadows on the first few seconds are power lines which appear to move across the face of the Sun but it's the Sun's apparent motion across the sky, tracked by the telescope/camera, that accounts for the motion. 

This view was captured with a special solar filter, a Baader solar film filter. Without it, pointing my telescope and camera at the Sun would have damaged my equipment. 

As we are approaching "solar maximum", the Sun is pretty active so there are plenty of Sunspots across the face of the Sun right now. 

Here's what I used to create this timelapse. I set the internal intervalometer on the D750 to take shots every 30 seconds at 1/1000th shutter speed from just before till just after the eclipse, about 380 shots in all. Just to be sure I didn't have to worry about batteries in the camera and tracker lasting long enough, I ran everything off an external power pack stored under the tripod. You can see the equipment in action in my post on eclipse preparations

Equipment
Sky Watcher EvoStar 72ED Refractor
Sky Watcher 0.85 Flattener/Reducer
Sigma 2X Teleconverter
DeepSkyDad AF3 Autofocuser
Baader Solar Film Filter
Nikon D750 DSLR
Sky Watcher Star Adventurer 2 Tracker
Radian Carbon Fiber Tripod

Processed on Mac OS with 
Adobe Lightroom Classic
LRTimelapse
DaVinci Resolve

Music
"Eclipse"
by 1st Contact
Shared under Creative Commons License
Attribution-ShareAlike 4.0 International License

Friday, October 13, 2023

Preparations for the Annular, er, Partial Solar Eclipse!

Tomorrow's the day! As mentioned in my last post, tomorrow an annular solar eclipse is visible across a stretch of the western half of the North American continent. 

For the rest of the country - including Dallas where I live - we won't get to see the Ring of Fire but we'll still get to observe a partial solar eclipse. 

Screen shot from Stellarium
Here is what the Sun will look like at maximum eclipse for Dallas (about 11:52am local time). Although that area blocked by the Moon in this simulation looks blue, keep in mind that this is a new moon which means we don't see any illuminated lunar surface since the Moon is in between us and the Sun. 

While you would think that with this much of the Sun covered up the amount of light we see would be low enough to be safe to view without eye protection, it's not! Except during the totality phase of a total solar eclipse when the Moon is completely blocking the solar surface, it is not safe to look directly at the Sun. If you are interested in seeing the eclipse tomorrow, only do so if you have a set of solar eclipse viewing glasses from a reputable source. If you don't already have eclipse glasses it may be too late to get some but here is information from NASA on safe viewing resources

Personally, I am treating this eclipse as a trial run for the total solar eclipse that will pass over North Texas on April 8, 2024. I plan to capture the partial eclipse from start to finish using my Nikon D750 and EvoStar 72ED refractor telescope with solar filter mounted on my Star Adventurer tracker. I'll leave it running from well before the eclipse through past the end of the eclipse, capturing a couple of shots a minute. Hopefully, the result will be a handful of good shots of different stages of the eclipse and possibly a sequence of shots I can use to make a timelapse video of the eclipse from start to finish. 

A lot has to happen for this to be successful - a good polar alignment of the telescope the night before, being able to get a good focus of the Sun once it peeks above the trees, the weather forecast being accurate (i.e., no clouds) - but even if it doesn't work out as planned, it will still be good practice for April!

Here are shots of my equipment set up for a test run today. 

That solar filter is critical for
safely photographing the Sun!

The tracker keeps the telescope pointed
at the Sun as it moves across the sky.


I hope you get to see the eclipse, too. Just be sure to be safe when viewing the Sun!


Thursday, September 14, 2023

Countdown to Annular Eclipse

May 2012 Annular Eclipse from Albequerque
Sequence from 2012 Annular Solar Eclipse
Photo by Nathan Eaton

We are just a month away from the next solar eclipse! On October 14th, 2023, people from the upper west coast down across Texas and in parts of Central and South America will have the opportunity to see an annular solar eclipse. As with all solar eclipses, this one involves the Moon passing between the Earth and the Sun. This time, the Moon will be farther out in its orbit around the Earth, making its angular size just a bit smaller than that of the Sun. In such a case, the Moon doesn't quite cover the face of the Sun. Consequently, at mid-eclipse viewers along the centerline of the eclipse track will get to see the Ring of Fire, a view in which the Moon is centered over the Sun with a fraction of the solar surface showing all round the Moon. 

The image sequence above is one I took during an annular eclipse in 2012 when we were visiting Albuquerque, New Mexico. Shot with a Nikon D7000 DSLR through a telephoto lens and a Baader film white light filter, it shows the eclipse from near the start at top left as the Moon has begun to cover the Sun, progressing across and down to the Ring of Fire view at bottom left then on through near the eclipse end at bottom right. For that eclipse, the Sun set before the eclipse was over so I wasn't able to get any shots of the final phase. The reason for the yellow color in that last shot is partly because the Sun was close to sunset and partly due to heavy smoke in the atmosphere from fires west of Albuquerque. Basically, the image came out yellow for the same reason a sunset with heavy clouds to the west looks yellowish to reddish; the denser atmosphere with heavy particulates (in this case, smoke) filters out shorter wavelengths, only letting the longer (and redder) wavelengths through. 

To see how close the path of the eclipse comes to where you live and to see where and when you can view it in person, check out Xavier Jubier's interactive map for the eclipse. Click anywhere on the map and it will give you details of the eclipse for that location including when it starts and ends, how long it lasts and how much of the Sun will be eclipsed by the Moon. Note that the path of the eclipse on the map represents the areas where the annular form of the eclipse will be visible. In the Dallas area, we'll experience a partial eclipse since the Moon never moves completely over the face of the Sun from our vantage point. Unfortunately, we won't get to see the Ring of Fire here. 

Where will you be during the eclipse? 

See the NASA eclipse page for more information on this eclipse as well as the total solar eclipse next April

WARNING

Be sure to NEVER look directly at the sun without appropriate eye protection. Read up on safe viewing techniques before viewing the eclipse. 

Friday, September 8, 2023

Demystifying Light Streaks in Night Sky Images: Meteor, Plane, Satellite, or Space Station?

Long exposure night sky photography can capture the beauty of the cosmos, whether it depict stars, solar system objects, the Milky Way or deep sky objects such as galaxies and nebulae. Sometimes though, such images include streaks of light that were unexpected. In some cases, we’ve luckily captured a speck of dust streaking through Earth’s upper atmosphere, glowing as it burns up, what we know as meteors. But often that streak across the photo is something else. For example, what about this one?

Photo by Nathan Eaton

Well, this one is more of a smudge than a streak. A shot of Comet NeoWise (C/2020 F3), it's not likely to be mistaken for a meteor but I'm sharing it both because comets do trace a path across our night sky images but also as I was up at 5:00 a.m. this morning, out by the lake trying to capture a shot of Comet Nishimura (C/2023 P1) just as I am sure so many other people were. Also, of all the things I could think of that leave streaks of light across night sky images, comets seemed at least worth a mention. I'll leave UAPs for someone else to cover. 👽

Anyway, below I’ll share examples of other types of objects that may show up in night sky images and ways to tell when you’re seeing them.

First, a distinction to make. My focus here is on things that appear in night sky images taken with exposures at least a few seconds long. Obviously, when viewing the night sky directly, if you see a streak of light across the sky it’s typically going to be a meteor while the other objects I’ll discuss would appear to the eye as a relatively slowly moving point (or points) of light. It’s when these things are photographed over the length of seconds or minutes that they appear as a streak of light. 
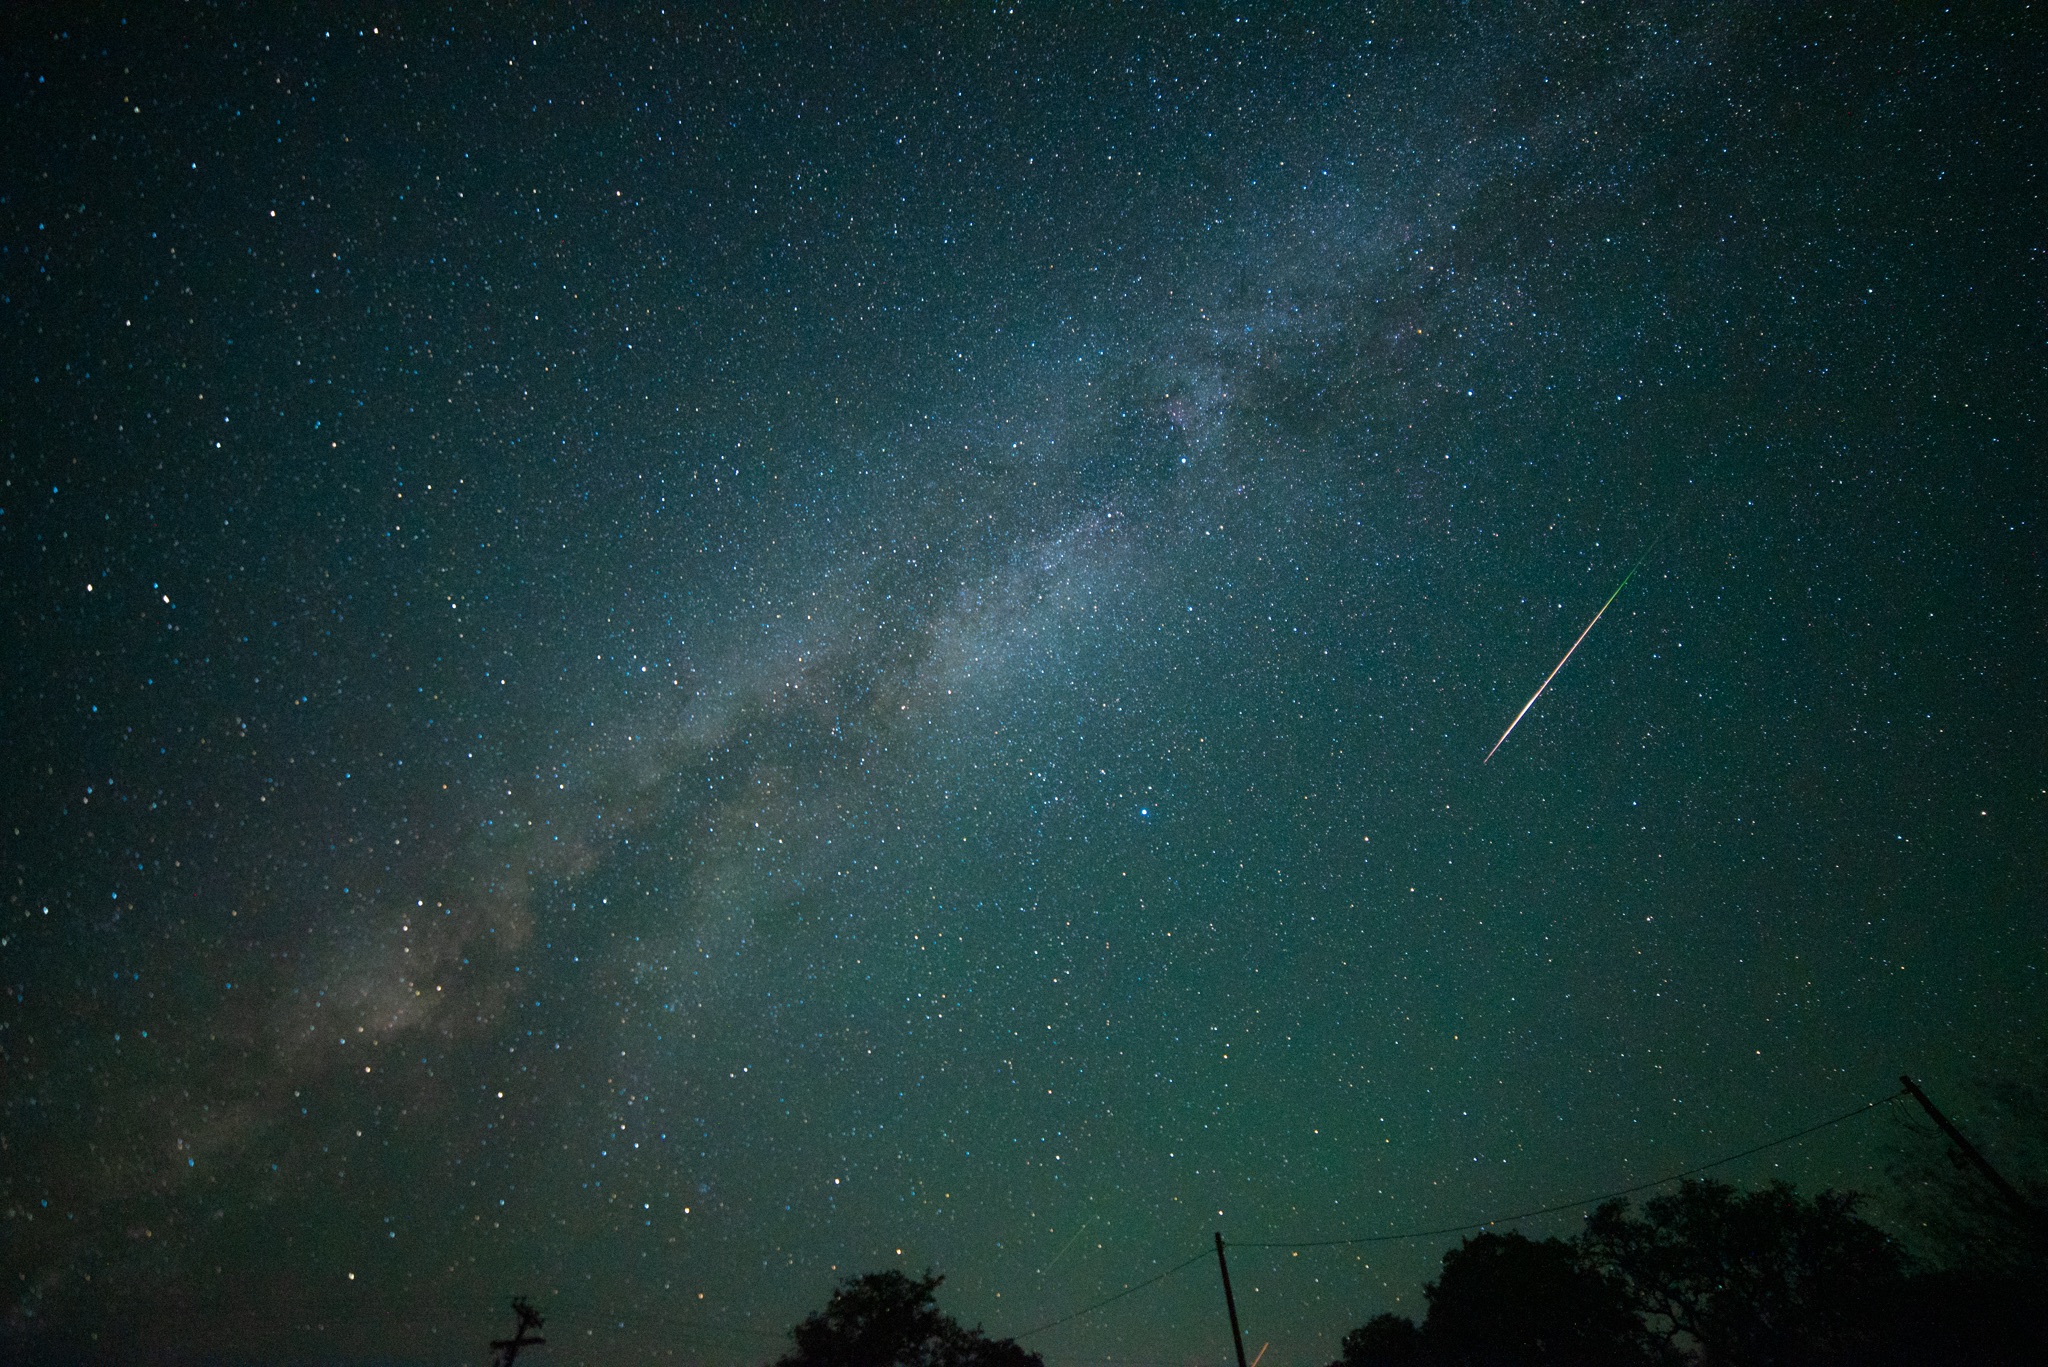
Meteors

A bright meteor passing below the Milky Way
Photo by Martha Dean via EarthSky.org

Although many streaks of light on long exposure images are taken for a meteor at first glance, there are a few key characteristics that can help confirm if that’s what you’re looking at. Generally, meteors in photographs (individually or from a meteor shower) usually:

Of course there are exceptions. You might find that a streak that otherwise appears to meet the characteristics listed above for a meteor but has a blunt end. In this case, your exposure may have started or ended during a meteor mid-flight. Another possibility is when the meteor is a bolide or a fireball. In this case, the streak will grow much larger and brighter at one end. It may also last long enough to appear in more than one frame of a sequence.  
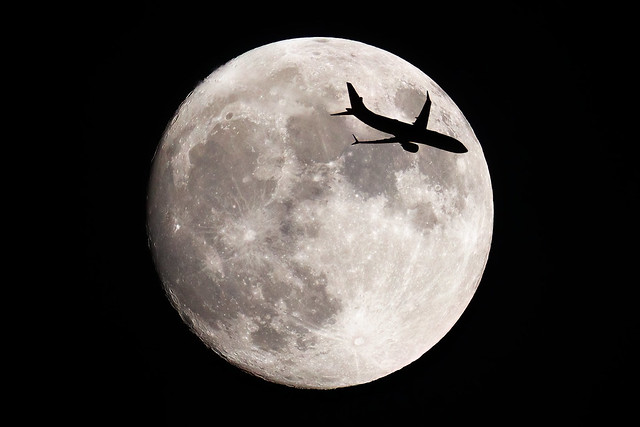

Aircraft

Stack of 8 second exposures capturing DFW-area aircraft
Photo by Nathan Eaton

Of all the things that might be mistaken for a meteor in a night sky photo, aircraft are usually the easiest to exclude. We have four things going for us in identifying when that streak of light is an aircraft:

  • they most often have multiple lights so on close inspection the streak is actually multiple streaks,
  • the different lights on aircraft are different colors, usually a combination of white, red and green,
  • the navigation lights (red on left wing, green on right) blink which will appear in a long exposure image as series of dots and/or dashes,
  • in image sequences, an aircraft will appear in multiple, consecutive images (though as in the image above, not always in a consistent direction). 

Satellites

Starlink Satellites
Photo by Jason Parnell-Brookes

With the dramatic increase in satellites launched into Earth orbit in recent years (nearly 38% between early 2022 and mid-2023), capturing a satellite in a long-exposure photograph of the night sky is becoming more and more likely. Although they vary in speed, altitude and direction, they often appear as solid streaks of light having a consistent brightness and color front end to end and the ends appear blunt rather than tapered like a meteor. As with aircraft, in image sequences a satellite will typically appear in multiple, consecutive images (though in a consistent direction). 

Satellites show up to us on the ground not because they have their own lights (like an aircraft) but because they reflect sunlight. In some cases, as a satellite passes over you the angle of its reflective surfaces may change, resulting in a brightening along part of the streak it left in your photograph. 

These days, that brightening is likely to be relatively minor. Prior to 2019, a constellation of 66 Iridium satellites were still in operation. Having highly reflective surfaces they commonly produced a streak of light in the sky called an Iridium flare, visible not just in photos but to viewers on the ground, much like a meteor. Often occurring shortly after sunset, they were bright enough to be visible even in the twilight sky. Since the last Iridium satellite was decommissioned in 2019 (burning up in the Earth’s atmosphere), there aren’t any other satellites that produce streaks of light across the sky quite so brightly. 

That said, today there is a new type of satellite that may make a big appearance in your night sky images: Starlink. Although individual Starlink satellites would appear as any other satellite once on-station 342 miles up, two factors make Starlink more likely to show up:

  • sheer numbers - as of last month, there are over 5000 of them in low Earth orbit (out of a grand total of about 12,000 total satellites in orbit, active or inactive),
  • the number launched at once, usually about 20 or so at a time - within the days after a launch and before they achieve full orbit, all of a group of Starlink satellites launched together are flying in a line, appearing in the sky as a series of dots, often referred to as a “train”.
These same points are also part of the reason Starlink is of particular concern for astronomers as are other new satellites now being deployed such as BlueWalker 3

The good news is that there are tools that can help identify whether that streak in your photo is a satellite. My favorite is Stellarium (available as free open source software for Windows, Mac and Linux or as paid software for iOS,  Android and Symbian). By setting the location where your shot was taken and the date/time of the image in Stellarium, you can zoom in on the area where the streak appears in your image and increase the time rate then watch for what crosses the same section of the sky. Sometimes it’s difficult to find what it was but I can usually confirm there was a satellite and which one it was.


Space Stations

Stack of 8 second exposures of ISS fly-over
Photo by Nathan Eaton

For the most part, craft like the International Space Station (ISS) would appear in a long exposure night sky image as a long streak similar to any other satellite. In the case of the ISS and eventually the China space station Tiangong, given their large size relative to other satellites they can sometimes appear brighter and result in a wider streak across your photo. Similar to other satellites, as a space station passes overhead it may pass into the Earth’s shadow before reaching the horizon. When this is captured in an image such as the one above, it may appear to fade out, perhaps even with a tapered appearance, rather than the light streak having a blunt end representative of your camera’s shutter closing. 

Another similarity space stations have to other satellites is that their orbits are well understood. This makes their appearance predictable. There are many tools available to forecast these appearances including NASA's Spot the Station. One of my favorites is Heavens Above. With it, you can see when various satellites and space stations are expected to be visible from your location.


Variation on a Theme: Solar and Lunar Transits

ISS Transiting the Moon
Photo by Andrew McCarthy

If having the ability to tell where satellites and space stations are in the sky piques your interest beyond just figuring out what that light streak across your long exposure night sky photo is, if you ever take solar or lunar photos, then another tool you should check out is Transit Finder. With it, you can identify when the ISS, the Hubble Space Telescope (HST) and other large craft in space will fly across the face of the Sun or Moon, giving you a chance to try your hand catching them in a photograph. Follow the link of the image above for information on what's involved. 


Thursday, August 31, 2023

Geek Break: Calculating Elevation of Jet Transiting the Sun

IMG_4503 v2
Brandon Ghany on Flickr

After my last post about capturing a jet flying in front of the Sun, I saw this image Brandon Ghany posted on Flickr of a jet crossing in front of the Moon and what caught my attention is how much smaller the jet is than in my video. 

From Brandon's description, this jet was flying at about 12,500 feet. Clearly, the jet I caught was flying much lower. But how low? I was curious enough to try figuring it out. 

The first factor to consider is that the Sun and Moon are similar but not exactly the same size from our viewpoint. Actually, the distance to the Moon varies a little at different points in its orbit so sometimes it is closer and thus a bit larger than the Sun (necessary to have a total solar eclipse) and sometimes it is farther away and thus a bit smaller than the Sun (leading to views like the Ring of Fire of an annular eclipse such as the one on October 14th this year). But in general terms, they are both roughly a half a degree across viewed from Earth. That means if Brandon had captured a jet at 12,500 feet passing in front of the Sun instead of the Moon, his image would have looked similar, at least in terms of the relationship between the size of the jet and the size of the celestial orb it passed in front of. 

The second factor is that while I know the angular size of the sun (reported by Stellarium as 31.68 arc minutes at the time of my video), for me to determine things like the jet's altitude, I need to know the jet's angular dimension, too. 

To calculate this, I captured a single frame from my video, cropped and rotated it then used drafting software (FreeCAD) to measure the relative difference between the width of the jet's fuselage and the width of the Sun. The ratio came out to 55.25% which means the width of the jet body is 17.5 arc minutes. 

So, how did you do in high school or college trig class? I muddled through but that was also so long ago, I just don't recall the exact formula to use. Thanks to Google, though, it was pretty easy to find what I needed.

d = ( w / Î¸ ) * 60

Simple, right? Well, except I'm missing one variable: w, or width. Google to the rescue again. If I assume that this jet was something like a Boing 737 or an Airbus 320, both pretty common models used by airline companies flying out of DFW and Love Field, then the width of the fuselage is approximately 13 feet. Plugging that into the formula as w and converting arc seconds to degrees and using that as Î¸, that tells me that the jet was approximately 2,674 feet away when it passed over our neighborhood. 

But was that how high it was flying? Not exactly since it wasn't directly over my backyard. Again checking Stellarium, I found that the Sun's altitude (its angle above the horizon) was about 62.65 degrees.

Dusting off more trigonometry, that gives me two variables of a right triangle, the angle and the hypotenuse. From those, I can calculate the jet's elevation (the opposite side of the triangle) and the distance over ground to the jet's position when it transited the Sun. 

o = h * sin(θ)

a = h * cosin(θ)

Solving these is pretty straightforward with a modern calculator or using spreadsheet software like Google Sheets. Note that these formulas require the angle to be expressed in radians but spreadsheets have a function for that, too, so you don't have to remember the formula for converting degrees to radians:

θ radians = Î¸ degrees * Ï€ / 180

So what's the answer? Based on the numbers above, at the time it passed in front of the Sun that jet was flying at an elevation of approximately 2,377 feet and its position over land was about 1,225 feet from my backyard, about a quarter of a mile to the southwest.

I would have thought the jets flying over East Dallas would be higher than that but the data and formulas say it has to be somewhere between 2,000 and 3,000 feet up. To see for yourself, make a copy of my spreadsheet and play around with what happens when you change the jet fuselage width (cell B7). Even if you change it to the size of a jumbo 747, 21.3 feet, the calculated elevation of the jet is still well under 4,000 feet.

Another interesting exercise would be to play around with the ratio of the jet fuselage width to the orb size to see what it has to be for the jet in Brandon's image to be flying at 12,500. Give it a try.

Remind you of one of those math word problems you hated solving in school?

Yeah, but pretty cool, huh?


Note
It's been decades since I was in school so if you find that I've made a mistake in my calculations, I'd be happy to hear about it in the comments.

Solar Transit of a Jet


UPDATE: I've replaced the previous video with a new version that includes the sound of the jet flyover from the original audio track. 

While out filming the sun to practice for the total solar eclipse next April, I was photo-bombed by a jet! 

The technical term is "transit", when an object crosses in front of an astronomical body. There is plenty of air traffic over our house with Love Field and DFW serving the area so I guess this shouldn't have surprised me but observing a transit (like this one, or this one) takes being in just the right place at just the right time so it's a pretty rare thing to have happen. 

One reason I happened to be shooting at this time is that I'm working out exactly what equipment I'm going to be shooting with for the total solar eclipse. This video was shot using:
  • Sky Watcher EvoStar 72ED refractor
  • Baader film solar filter
  • 2" mirror diagonal
  • Celestron 1.25" 2X Barlow
  • T2-ring
  • Nikon D750 DSLR
  • Focusing with DeepSkyDad AF3 autofocuser
  • Sky Watcher Star Adventurer 2 tracker
  • Radian carbon fiber tripod
I have a new 2" 2X Barlow and I plan to shoot straight-through (i.e., no diagonal) but I am still working out what combination of components will allow me to properly focus with the new Barlow. Once I have that worked out, I'll start working on automating my astrophotography workflow using a small computer (a Raspberry 4 running software called StellerMate).  

The quality of this video isn't great but that's basically because I was focusing (pun intended) more on getting the equipment working right than on the finer details. Next April may see a long ways off but it will be here in the blink of an eye and as I know from my experience in 2017, being ready to catch a full eclipse end-to-end, most importantly those few minutes of totality, takes an incredible amount of practice. So, I'll be shooting pretty regularly over the next few months to make sure I have everything working perfectly. 

Anyone have a way to ensure that April clouds don't spoil the eclipse for me, er, us?

Seriously, you'll notice from the video that the Sun is pretty active with quite a few sunspots showing. Over the next few weeks, if I can get a day with good "seeing" (i.e., where there is minimal air turbulence), I'll get some shots with lots of detail, everything in focus, and the sunspots should jump off the page at you. Stay tuned!

Warning 
NEVER look directly at the sun without proper protection. This video was shot using a telescope and camera equipped with a special solar filter.

Wednesday, August 30, 2023

Blue Moon Rising Over White Rock Lake

With the extreme Texas heat, lately I've been waiting till after sunset to take our Weimaraner, Luna, for a walk and we've been walking along the shore of White Rock Lake near where we live since it's often cooler with a little breeze coming off the water. 

I had not planned to shoot the Blue Moon tonight, but after my wife Linda asked if I would be, it occurred to me that it would be visible over the eastern shore of the lake when Luna and I were out walking. I decided to see if I could get a shot of the full Moon rising over the sailboats at Corinthian Sailing Club before our walk. I grabbed my small refractor (Sky Watcher EvoStar 72ED), my Nikon D750 and a tripod, loaded Luna in the car and headed to the lake. 

Apparently, so did everyone else. I guess the news of the Blue Super Moon got enough press that lots of other people showed up at the lake to watch it rise and traffic driving up the west shore was like rush hour. By the time I was parking the Moon was already well above the tree line. I hastily set up the scope and camera, got a reasonably good focus on the Moon and started shooting. All the while, Luna hung out with me, thankfully only wrapping her lead around the tripod as I was finishing up. 

Ironically, the shot below was the first shot I took. Of all the others, I could perhaps merge a few bracketed shots for something with a higher dynamic range but frankly this is pretty much the shot I had in mind when I left the house. 

Enjoy!

Blue Moon Rising Over White Rick Lake

As always, click on the image to see full-screen. 

Sunday, August 13, 2023

2023 Perseids and Mesquite Tree

In the wee hours of this morning, my mother Doris' birthday, I drove out east of Dallas looking for dark(er) skies to view and capture the 2023 Perseid meteor shower. The first spot I had planned to try turned out to have more brightness in the sky than I hoped for so I went a little farther out and found a quiet spot on a country road in College Mound just southeast of Terrell. Parking well off the road in front of a pasture gate, I set up two cameras shooting east across the pasture with a mesquite tree in the foreground. I'm still going through all the images and may eventually post a composite similar to the one I did in 2016 but this image has the best and brightest of the ones I captured. 

This was taken with a Nikon D750 using an Irix Firefly 15mm f/2.4 wide angle lens. It's a 20 second exposure taken at f/2.8 and IS) 6400. I processed it in Lightroom to adjust brightness, contrast and color temperature. 

Not an ideal composition given the streaking speck of comet dust is right at the edge of the frame and cut off midflight but it's still a beauty. And it's not alone. Besides the Pleiades and Jupiter, look close and you'll find at least one other Perseid and at least one satellite. Even with the comparatively dark Bortle 4.5 class skies, there are still light domes on the horizon from towns further east like Wills Point to the left. The yellowish glow towards the center is from the rising crescent moon not yet visible above the treeline.

I'll share more once I have time to go through the rest of the images from both cameras. In the meantime, enjoy!

Click the image to enlarge. 

Friday, August 4, 2023

Olivia and Papa Chase the ISS and More

Last month, my granddaughter Harper and I went out to capture an image of the International Space Station (ISS) flying over Dallas. As described in my post about that effort, we were only partially successful, foiled by clouds. This past Tuesday evening, granddaughter Olivia and I headed up to the north shore of White Rock Lake to try again. In spite of being a little late getting to the lake and rushing to set up cameras, we managed to catch the last 90 seconds or so of the ISS flyover as it traveled from the northwest, overhead and down to the southeast. Here is the result.


This is a composite image created by stacking 9 images taken with a Nikon D750 and a Rokinon 14mm wide angle lens mounted on a tripod. Each shot was 8 seconds long with 2 seconds between each shot. What Olivia and I saw was an incredibly bright "star" moving across the sky, too steady and too fast to be an airplane. It appears as a streak in this image due to the long exposure of each original image; the gaps are due to the delay between each shot while the camera saved the image files. 

This photo demonstrates an interesting aspect of ISS flyovers. We can see the ISS fly by only at certain times and places, its visibility due to the viewer being in a position to see sunlight reflected off of the ISS. For this flyover, as it was traveling "away" from the sun (which had set just over an hour earlier) its orbit carried it into the Earth's shadow. Notice how the lowest trail fades off and disappears. 

Another interesting object in the sky that night was the Sturgeon Moon, the first of two "supermoons" this month. It was cloaked in clouds until just as we were getting in the car to head home so it just appears in this image as a bright glow to the lower left. Note all the people on the dock though; there was quite a crowd out that night with people all up and down the shoreline to watch the full moon rising. I wonder how many of them also realized they were getting a chance to see the ISS, too.

We also tried to capture a flyover of a satellite, BlueWalker 3, which passed over this same view looking south across the lake about a half-hour before the ISS flyover. Unfortunately, even having two cameras shooting during its flyover, we didn't capture it. I'm not sure whether it was due to its lower elevation, the haze to the south east or a miscalculation on my part about where and when we would see it. That'll be a target to try for another night. 

Thanks to the long exposures taken, the composite includes more than just the ISS and the Moon. Stars of the constellation Sagittarius (the Archer) and Scorpio (the Scorpion) are visible including Antares, the red super-giant star that is known as the Heart of the Scorpion. Here is a labeled version of the image above. 


The images above were edited to remove all the other stuff we saw in the sky that night: aircraft. The following is a composite of 12 images stacked "as is" in Photoshop. It shows not only the ISS but all the aircraft trails captured. Having simply stacked the images, stars appear as streaks and headlights and taillights of cars on the far shore of the lake appear as streaks. 


One final image, this time an edited stack of all the images, showing not only the ISS but all the aircraft trails captured. Unlike the unedited stack, in this view the sky (Moon and stars), lake and even the car headlights on the far shore are all from a single image. The aircraft and ISS trails from the other 11 images were masked to overlay that single image.


As always, click on an image to see large. 

Tuesday, July 25, 2023

Jack and Papa Capturing Moon and Planets

While our grandson Jack stayed with us last week, he and I went out one evening to take our Weimaraner, Luna, for a walk on the east shore of White Rock Lake and to try capturing the 3-day old crescent Moon, Mars, Venus and Mercury over the iconic Pump Station. 

We were partially successful. Jack got in a dozen or so shots with my Nikon D750, starting with some test shots and then bracketing to try and get both the properly exposed lunar crescent and also the rest of the lunar surface lit with Earthshine. As explained below we didn't quite get what we wanted. Had the mosquitoes not chased us off, we might have eventually got it but Luna was getting impatient anyway so we put the camera away and went for our walk. 

Unfortunately, the brackets didn't get us quite enough dynamic range to get both Earthshine and a lunar crescent that showed any detail. In the end, a single shot had the best overall exposure and detail that we were after. Although the lunar crescent is heavily over-exposed, the Earthshine-lit surface is still visible. And although Mercury is lost in the haze over Dallas, in addition to dim Mars and bright Venus you can just make out the stars of the "front-end" of the constellation Leo the Lion with it's brightest star, Regulus. 

Here is the final shot and below is a version that is labeled. Enjoy!

Photo by Jackson Eaton


Photo by Jackson Eaton


As always, click on image to view full-screen.

Friday, July 21, 2023

Bedroom Camera Obscura Timelapse


Building on the project described in my last post which involved creating a camera obscura out of a bedroom with our grandkids Olivia and Jack, we have taken the project to the next level: video!

For this, we used Olivia's pinhole lens which with its larger aperture allowed shooting shorter exposures. That let us maximize how many frames we could capture in a given amount of time. I re-framed the view in my Nikon D750 to take advantage of the wall space on the right and we then set it up to take one ten-second shot every 12 seconds. At the end of an hour and 10 minutes, I stopped the camera, having taken 348 images. 

The next step was loading the images on the computer, cropping to a 16:9 ratio and adjusting the exposure a little in Lightroom plus inverting them vertically, then using LRTimelapse to render a 4K video. The last step was adding titles and music (Pounded Piano by Podington Bear) in Da Vinci Resolve. 

This was shot at a busy time in the backyard, with our Weimaraner Luna coming and going and with the grass being  mowed. The timelapse also captures clouds floating by and the shadows of trees and such moving. 

This is short but pretty cool... Enjoy! 

Best viewed full-screen. 

Wednesday, July 19, 2023

Olivia, Jack and Papa Build a Camera Obscura Out of a Bedroom!

Last week, our granddaughter Harper stayed with us (see previous post). This week, it is her brother Jack and cousin Olivia. They are also attending Dallas Parks & Recreation Outdoor Adventure Camp during the day and in the evening we're having other adventures with them. While Harper's camp was focused on photography, this week the focus at camp is on archery. Linda and I don't have a lot of archery experience so our evening adventures are things that are more in our wheelhouse. One of those is photography. :-)

Optics: the principle of the camera obscura.
Engraving, 1752. Wellcome Collection
Tuesday evening, the project was to build a camera obscura. If you aren't familiar with the term, it's an ancient discovery that by having a darkened room with a small hole in a wall or window, a view of the outside scene is projected onto the opposite wall. The image is inverted (sky below, ground above) and in practice is pretty dim. In this digital age, as an alternative to sitting for a long period for your eyes to become dark-adapted enough to see the image, you can capture it with a camera capable of taking long-exposure photographs. 

 There are various tutorials available online on how to create a camera obscura out of a room in your house and capture the image on a camera. We used this one from the George Eastman Museum. It's very clear and easy to follow.  

Outside view of Camera Obscura
In choosing a room to use, we went with the master bedroom. Not only does it have a window with a reasonably interesting view (our backyard) but there is just that one window and although the room has glass doors facing our patio, there is a storm shutter that (mostly) blocks all the light from it.

While the kids were at camp, I masked off the outside of the window which was simpler than trying to tape plastic over the inside. Using cardboard, a black tarp, some plastic bags and gaffer's tape it was pretty quick and easy to block out all light from the window. It ain't pretty, but it's functional. 

The next step was to make lens boards with pinhole lenses. After the kids got home, we sat down to fashion them from cardboard, washers and gaffer's tape. Olivia's has a smaller hole (aperture) which would potentially give a sharper image but requiring much longer exposures; the aperture on Jack's was a bit bigger. 

Next, we finished prepping the bedroom. Initially, we just used towels on the floor to block light coming in through doors and a towel hung over the bathroom door since it had a bigger gap, let more light through. Later, we tried painter's tape. 

As I mentioned, the image in even a darkened room is a bit dim. Given that it takes about a half-hour for our eyes to become dark-adapted after being in a brightly lit room, it wasn't really practical to stay locked up in the bedroom for that long given the kids still needed to get showers after a hot day at camp and we hadn't yet had dinner. Not to mention the impatience of a 12 year-old and a 10 year-old. :-D

Instead, I pulled out my Nikon D750 with a wide angle lens and we captured the view with exposures ranging from 30 to 55 seconds. Of the images below, the first was taken before dinner while it was still pretty bright outdoors; you can see there is still direct sunlight on the fence. It was also taken with Jack's pinhole lens with it's slightly larger aperture so the image is nice and bright. The other two were taken after dinner so it was getting a bit darker outside; there is only a sliver of direct sunlight on the fence. The first one is with Olivia's pinhole lens, the second with Jack's. 

These images have been inverted vertically to emphasize the "normal" view of the backyard but that means everything in the room is upside down with the bed on top (lit blue by the sky) and the ceiling fan down "in the grass". Also, notice that the entire inside of the room is the "camera". Pretty cool!

Shot early evening with larger aperture


Shot later in evening with smaller aperture


Shot later in evening with larger aperture


We have a few other ideas for the camera obscura, interesting alternatives to explore, so stay tuned... we might have more to share soon!

As always, click on an image to see it large.

Friday, July 14, 2023

Harper and Papa Chasing the ISS

UPDATE: Keep reading for the "rest of the story" but here is the same image as below but cropped vertically to focus attention more on the ISS trail. Enjoy!

Our granddaughter Harper stayed with us this week. During the day, she was attending Dallas Parks & Recreation Outdoor Adventure Camp and the theme this week was photography. As I am an avid shutterbug I also spent a little time each evening with her, messing around with cameras, talking about how to take good pictures, etc. 

As I was checking to see what the evening weather would be with the idea that we could maybe take some night sky shots, I noticed that Tuesday evening the International Space Station (ISS) was going to be passing over. Even better, it would be rising just over downtown when seen from up by White Rock Lake. That night around 9:00 pm, we headed up to Winfrey Point and set up my Nikon D750 with an Irix 15mm wide angle lens. Once the camera was set up on the tripod, I let Harper take all the test shots and then we set the camera to shoot a sequence of 20 second shots. ISS was going to be visible for about 7 minutes, only 3 of which would be visible to the camera facing due west. After it passed overhead, we also tried capturing shots to the northeast but lights and trees were in the way.

The next day we loaded the captured images into Lightroom and I did some basic edits for exposure, contrast, etc. and then we loaded them as layers in a single image in Photoshop. As each layer contained a section of the ISS flyover, our goal was to follow instructions from this online article to stack all the images to end up with one image with a full track of the ISS, from when it was first visible (about 10 degrees above the horizon) until it passed out of the camera frame. 

Unfortunately, while the weather report had been for clear skies, there was actually a lot of haze on the horizon and clouds across the path of the ISS. Here is the result of just stacking all the images.

Harper thinks this version is kind of cool and I agree. The streaks of the clouds are pretty surreal and the airplane trails and the few star trails convey a lot of action.  The problem is that you can only get glimpses of the ISS trail as it is mostly obscured by the clouds. Even where it might have been clearly visible in one frame, once we stack all the other frames on that then some or all of it is obscured by the clouds. 

That led us to research other ways to achieve what we were after. With the help of ChatGPT, we learned some Photoshop techniques that allowed us to selectively mask out everything but the ISS trail, stack those and combine them with a base image that included the foreground with the lake and downtown Dallas and in which most of the clouds were to the right. We also removed a couple of airplane trails so that the ISS trail is the "star" of the image.

Here is the end result. It's not exactly what we intended to shoot - the ISS trail is spotty and the gaps don't always match the cloud gaps in the base image - but we are pretty happy with it. 


This was just the start, though. Now we are watching out for other nights when the ISS will fly overhead where the skies are clear and it will pass over an interesting foreground like the lake and downtown in this image. More to come!

If you are interested in finding out when the ISS flies overhead where you live, there are many resources but one of my favorites is the Heavens Above. Here is the ISS Visible Passes chart and here are the details for the flyover we captured

As always, click on an image to enlarge. Clear skies, y'all!

Friday, June 30, 2023

Reasons to Be Cheerful

I am a big fan of the Talking Heads and David Byrne. I admire not only his music but also his passion for social consciousness, which is evident in his music, art, and writing. In 2018, he launched the web site and lecture series Reasons to Be Cheerful. Over the years their articles have been a great source of hopefulness and inspiration. 

The title of one of their latest articles, West Texas Oil Country is Revealing a Sky Full of Stars, caught my eye as my son Brian and I visited Big Bend National Park and McDonald Observatory back in April and had driven through the Permian Basin. Imagine my surprise to find that the article showcased a photo taken on that trip, the one I now use as the header for this blog and described in the post The Road to the Stars. Thanks to the author for including my image and for providing proper attribution. 


The article itself discusses the encouraging progress being made to reduce light pollution in West Texas, with the assistance of the oil industry. If you haven't been to Big Bend, you should definitely put it on your bucket list as the night sky there is truly breathtaking and must be witnessed firsthand. And make sure to attend a star party at McDonald Observatory, where scientists are conducting valuable research and the visitor staff excels at explaining the wonders of the night sky. 

Personally, I feel protecting the dark skies of West Texas is something worthwhile. In addition to the article above, you can find out more about dark sky protection in the area at web sites for the Greater Big Bend International Dark Sky Reserve and the International Dark Sky Association.

I still have addditional images and some video from our trip to share. Here is one of the Milky Way over Casa Grande taken from the Chisos Basin. This was captured with using the incredible Night Sight feature on my Pixel 7 phone. 


As always, click on images to see full-sized. 

Friday, June 9, 2023

Chasing the Strawberry Moon Over Downtown Dallas - Remix


This is a remix of previously posted video of the 2023 Strawberry Moon, this time including a cropped view that better highlights the Strawberry Moon rising through the clouds behind Reunion Tower.

Watch full-screen for best view. 

Wednesday, June 7, 2023

Chasing the Strawberry Moon Over Dallas


Although the clouds interfered with getting a clean telephoto image of the full Strawberry Moon of 2023 above Reunion Tower in Dallas (my original goal), I was still able to capture this sequence of it through the clouds as it rose over downtown just after sunset on June 3rd. 

This is 34 minutes compressed into about 12 seconds. Watch center-frame and you'll see the moon just peak through the clouds and then pop in and out through to the end, tracing an arch up and above Reunion Tower.

Timlapse sequence captured with a Nikon D750 and Nikkor 24-120 lens at 40mm, shot from Trammel Crow Park on the Trinity River. Processed with Lightroom Classic, LRTimeLapse and Da Vinci Resolve.

See my shot of the Strawberry Moon over downtown last year here.

Music is Time's Up by Loopop, YouTube Media Library.

Watch full-screen to get the full effect. 

Monday, May 1, 2023

The Road to the Stars

The Road to the Stars
neatonjr @ Flickr

After a long session capturing images of the Milky Way in Big Bend National Park for time lapse, my son Brian and I headed back to the Chisos Basin, stopping along the way at a spot I had mapped out in PhotoPills to capture a shot with a perspective view of the road ahead with the Milky Way beyond. 

Initially the plan had been to capture a sequence of relatively short exposure images with separate foreground and sky shots at different ISO, then stacking registration frames to get the highest quality result possible. Unfortunately, just as I was setting up, we saw headlights down below. With such dark skies, the headlights were obvious while the car was still on Gano Springs Road and about 4 miles away so we knew we had 5-6 minutes but that wasn't enough to capture the planned sequence, just enough to get the composition framed and focused using test shots. I went for one 30 second shot knowing I'd get a little star trailing, then we threw everything back in the car and headed to the lodge. We had finished with enough time that the other car was still a mile or more behind us.

To pull out detail in the foreground, I did initial adjustments to the sky such as exposure, curves, white balance, etc. and then used the Lightroom sky masking tool to mask the sky, inverted it and then made adjustments to lighten the foreground. After touching up some noise spots with the healing brush, this is the end result.

Image details:
Nikon D750 on Radian tripod
Irix Firefly f/2.4 15mm lens
ISO 6400
30 seconds @ f/2.8

Click on the image to see large on Flickr. 

Enjoy!