Showing posts with label grandkids. Show all posts

Sunday, February 5, 2023

Eaton Family Solarcan Project - Phase 3: Kaili

As covered in previous posts, late in 2021 I discovered a product called the Solarcan, a pinhole camera created using an aluminum can with a small hole in the side and photographic paper inside, all to capture long-period exposures (weeks, months, years) of the Sun as it moves across the sky each day, images called solargraphs. I bought a five-pack of Solarcans in December 2021 and gave four to my grandkids as Christmas gifts. 

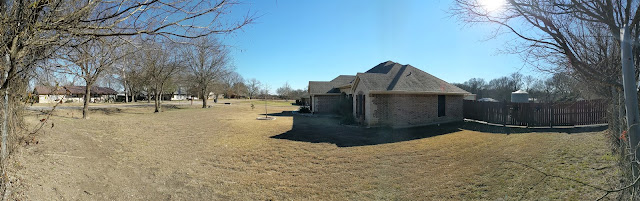
In the Phase 2 posts, I covered helping my grandkids set up their Solarcans. The plan for each one was to have them up about 6 months. For the one Kaili and I put up (see this post), the plan was to leave it up till at least the winter solstice but she decided she wanted to leave it up longer. Here are views of her Solarcan taken in November including a view from the Solarcan. 

Kaili's Solarcan
View from the cul de sac
View from the Solarcan

Kaili took her Solarcan down today. Following the Solarcan instructions for developing solargraphs, I opened it and scanned the photographic paper contained in the can.


In the initial scan, the sky and the arcs traced by the Sun are dark and the foreground is light. The reason is that the photographic paper reacts to light by darkening, resulting in a negative image. The bright spot on the sides of the image are the result of tabs on the inside of the Solarcan that hold the paper in place; because they overlap the paper, they block the light, preventing the paper from darkening. 

The next step in the development process is to convert the image from negative to positive. After that, the goal of processing is getting an image in which some of the details come out (e.g., adjusting exposure and contrast) and adjusting color and other variables to get something that looks interesting. Here is the final result.


Like the solargraphs done by Olivia, Jack and Harper, the dominant feature is the arcs across the top representing the path through the sky of the Sun. Long, bold lines are from sunny days and thin lines or ones with gaps are from cloudy or partly-cloudy days. After the winter solstice, the Sun started passing a little higher each day so I think the fact that it was tracing back over the days leading up to the solstice is why the lower lines are so much brighter (i.e., twice as much exposure in those areas). 

The thing that is cool about this one is the basketball backboard. Of course, that was what we were hoping for (see photos of the view from the Solarcan). What we hadn't planned for is there being two. But there is just one backboard (at least on this side of the cul de sac) so what's up?

Notice that it's not just the backboard that shows up twice. So does the light post. And if you look closely, there are two images of other things too... the trees in the distance and the house across the street. What must have happened is that at some point during the time the Solarcan was active, it got bumped which left the pinhole pointing a little bit to the side. The "double-exposure" effect that resulted is similar to what happened with Jack's and Harper's. I imagine that it's not uncommon for a Solarcan left up for months (or years) to get moved, whether it's by an animal, the weather or maybe even a basketball. :-)

As always, click on an image to see it full screen.  


Friday, August 5, 2022

Eaton Family Solarcan Project - Phase 3: Jack and Harper

As covered in previous posts, late last year I discovered a product called the Solarcan, a pinhole camera created using an aluminum can with a small hole in the side and photographic paper inside, all to capture long-period exposures (weeks, months, years) of the Sun as it moves across the sky each day, images called solargraphs. I bought a five-pack of Solarcans in December and gave four to my grandkids as Christmas gifts . 

In the Phase 2 posts, I covered helping my grandkids set up their Solarcans. The plan for each one was to have them up about 6 months. For the ones Jack, Harper and I put up (see this post), the 6 months was up on July 17th. Here are views of the their Solarcans as we prepared to take them down on July 29th:

Jack's Solarcan
Harper's Solarcan

One of the things we noticed is that each of their Solarcan's were just a little bit crooked; they were straight when we put them out. More about this below. 

Following the Solarcan instructions for developing solargraphs, we scanned each image. 
Scan of Jack's solargraph
Scan of Harper's solargraph

The initial scans look a little odd... the sky and the arcs traced by the Sun are dark and the foreground is light. The reason is that the photographic paper reacts to light by darkening, resulting in a negative image. The bright spot on the sides of each image are the result of tabs on the inside of the Solarcan that hold the paper in place; because they overlap the paper, they block the light, preventing the paper from darkening. 

The next step in the development process is to convert each image from negative to positive. After that, the goal processing is getting an image in which some of the details come out (e.g., adjusting exposure and contrast) and adjusting color and other variables to get something that looks interesting. Here is the final result. 
Jack's finished solargraph
Harper's finished solargraph

As covered in the Phase 2 post, Jack's Solarcan was mounted in their back yard with the shop and chicken coop in the foreground while Harper's was mounted in their front yard with a view of the house in the foreground (though the chicken coop was visible over the fence). If you look closely, you can see all those details in these images. 

As with other solargraphs (including Olivia's), the lines traced across the top of the image represent the path of the Sun each day. These solargraphs were started about a month after the winter solstice so the earliest lines are the lower ones, reflecting the low path across the sky of a winter Sun. As time passed, new lines appear higher and higher on the image. Gaps appear where there were days (or parts of days) in which the Sun was obscured by clouds. One reason there are differences in these two solargraphs (even though they were mounted relatively close together) has to do with another thing that blocked the sunlight: tree limbs. You can see the trees more prominently in Harper's solargraph. You can see in the first images above that there are trees closer to where it was mounted compared to Jack's.  

The other unusual aspect of these images is the strange "double-exposure" appearance, most obvious on the right side of Jack's image where there is a second, lighter horizon above the darker horizon below and the lighter one is at an angle. As mentioned above, we installed each Solarcan vertically on a post but when we took them down, each was just a little crooked. 

We aren't sure what happened but it seems clear that about 4 months (roughly 2/3rd of the way through the exposure) something knocked each can over a little. When that happened, effectively a "new exposure" was started. It's hard to tell but the effect even shows up in the lines traced by the Sun (the highest ones are a bit blurred where ones traced after the cans were knocked over overlap the earlier lines). 

Although our initial reaction was that this was an error, that the solargraphs were "messed up", the more we talked about it, the more unique it seemed. Jack, Harper and I now consider these to be extra special, very unique!

As always, click on an image to see full screen.  

Saturday, July 30, 2022

Eaton Family Solarcan Project - Phase 3: Olivia

As covered in previous posts, late last year I discovered a product called the Solarcan, a pinhole camera created using an aluminum can with a small hole in the side and photographic paper inside, all to capture long-period exposures (weeks, months, years) of the Sun as it moves across the sky each day, images called solargraphs. 

I bought a five-pack of Solarcans in December and used one to shoot a sample shot to share with my grandkids; see Phase 1 post. I gave the other four to them as Christmas gifts. 

In the Phase 2 posts, I covered helping my grandkids set up their Solarcans. The plan for each one was to have them up about 6 months. For the one Olivia and I put up (see this post), it turned out we needed to take it down a little early. On July 9th, we took it down. Here is the raw scan. 

Although the arcs traced across the sky by the sun are pretty easy to make out at the top, they do look a bit weird. One reason is that this photo, captured with a camera created with a piece of photographic paper inside a can with a pinhole on the opposite side of the can, is a negative, i.e., things that are bright appear dark and vice versa. 

So, the first step in processing a Solarcan solargraph after scanning it is to convert it from a negative to a positive. From there, everything else is about getting an image in which some of the details come out (e.g., adjusting exposure and contrast) and adjusting color and other variables to get something that looks interesting. The full workflow for this is described in the Solarcan instruction booklet

With Olivia's, I played around with two different color schemes, one blue and one magenta. Olivia likes the magenta one best. Here they are. 

To get a better sense of what the foreground in these show, check out the photo of their backyard from the Phase 2 post

On the left is their fence with the neighbor's trees just beyond. On the right is their house including the chimney at the far end of the roof. In the center is their patio with furniture, a grill, etc. 

As for streaks across the top, those represent the path of the sun arcing across the sky from East to West every day during the 140 days the Solarcan was up. 

As described in the earlier post, the gaps are the result of weather, specifically clouds. Bright, sunny days left a full arc from one side the to other. Overcast days left dark arcs where bright enough sunlight didn't hit the photographic paper to leave an imprint. Partly cloudy days resulted in arcs across the solargraph with gaps here and there. 

By the way, the reason the arcs of the Sun disappear off the top of the page is just because we mounted the Solarcan vertically and as the Sun got higher in the sky during mid-day, the light from it didn't fall directly on the photographic paper. If we had mounted it angled up slightly, then we would have gotten the full path of the Sun each day. 

Next up, I'll post about developing the solargraphs for Jack and Harper's Solarcans which we took down this week. Kaili's will stay up until about Christmas. Stay tuned for more images!

As always, click on an image to view full-screen. 

Tuesday, May 31, 2022

Eaton Family Solarcan Project - Phase 2: Kaili

As covered in previous posts, late last year I discovered a product called the Solarcan, a pinhole camera created using an aluminum can with a small hole in the side and photographic paper inside, all to capture long-period exposures (weeks, months, years) of the Sun as it moves across the sky each day, images called solargraphs. See Eaton Family Solarcan Project - Phase 2: Olivia for more on solargraphs and the beginning of our adventure with Solarcans. 

Recently, we spent the day with our oldest granddaughter, Kaili.  While at their house to pick her up, she and I installed her Solarcan.

As with Olivia's family, Kaili and her parents lives in the burbs. Kai is an athlete, having played many sports including soccer, football, golf and basketball. Their house is on a cul-de-sac with two basketball backboards across from each other. We decided that placing her Solarcan on the fence along the north side of the cul-de-sac, facing due south with one of the backboards in the foreground and one just off in the distance, would make for an interesting solargraph, one that highlighted her love of sports. 

Below is an aerial view with current directions for sun rise (yellow line) and sun set (orange line) as of the summer solstice, June 21st. The thinner line represents the direction of the sun a little after solar noon that day (keeping in mind that due to daylight savings time, solar mid-day is actually 1:00pm CDT). 

Installed this way, over the coming months the sun should trace arcs from left to right, from one side of the cul-de-sac to the other with their house on the west side. Each day the sun will trace an arc a little higher until we get to the summer solstice after which the arcs traced will be lower and lower. 

An interesting facet of the installation of Kai's Solarcan is the basketball backboard in the foreground; see the view from the installed Solarcan below. The sun's path across the sky as we get late in the year may go just behind the backboard, outlining it in silhouette. 

Of course, the backboard won't be the only thing that blocks the sun's tracks on the solargraph. Some days will be overcast, with clouds completely blocking the sun, while other days will be partly cloudy with the sun's path on the solargraph appearing with gaps during periods when the clouds are covering it. 

To see the final result, now we just have to be patient!

Our plan is to leave it up until just after the winter solstice, probably taking it down and developing the image around Christmas. Once that's done, I'll post the final solargraph and what we learn from it. 

Stay tuned!

Click on images to enlarge.


Sunday, February 27, 2022

Eaton Family Solarcan Project - Phase 2: Olivia

As covered in previous posts, late last year I discovered a product called the Solarcan, a pinhole camera created using an aluminum can with a small hole in the side and photographic paper inside, all to capture long-period exposures (weeks, months, years) of the Sun as it moves across the sky each day, images called solargraphs. 

Here is an example from the Solarcan Gallery:

I bought a five-pack of Solarcans in December and used one to shoot a sample shot to share with my grandkids; see Phase 1 post. I gave the other four to them as Christmas gifts. 

Last week, we visited our son Brian, his wife Amber and grandkids Olivia and Owen.  At 16 months old, Owen isn't quite ready for solargraphy so didn't get a Solarcan this time but Olivia and I spent time during our visit planning and installing hers.

While Jack and Harper (last post) live in a rural setting, Olivia's family lives in the burbs.  They have a new patio and it is where she, Owen and their Dachshunds, Oliver and Dash, love to play. It happens that their house faces almost due north so we installed Olivia's Solarcan on the front fence facing due south with their patio centered in the view. Here is an arial view with current directions for sun rise (yellow line) and sun set (orange line). 

Installed this way, over the coming months the sun should trace arcs from left to right, from above their  fence across the sky to their roof with the side yard and patio centered in the view. Each day the sun will trace an arc a little higher until we get to the summer solstice after which the arcs traced will be lower and lower. Here is the view from Olivia's installed Solarcan. 

Similar to the case with Harper's and the gallery example above, with some trees in view on the left, there should be some gaps in the solar paths across the image where branches block the light,  adding an interesting twist to the solargraph  when it is done. 

But the trees won't be the only reason for gaps. Notice the other gaps in the tracks of the sun in the gallery example? Any idea what those are from? 

You guessed it: cloudy days. Naturally, we can't capture the light of the sun on days when it's not visible!

When will we find out what Olivia's finished solargraph looks like? Our plan is to leave it up about 6 months but since we didn't get hers up until almost two months after the winter solstice, the lower tracks left by the sun won't be as low as they could have been. If she is patient, perhaps hers can stay up for a full year in which case there will be arcs of the sun across her solargraph from as low as the sun gets in the winter to as high as it gets in the summer! 


I'll post the results later this year so stay tuned... 


Tuesday, February 1, 2022

Eaton Family Solarcan Project - Phase 2: Jack and Harper

As covered in the Phase 1 post, I've started playing around with a product called the Solarcan, a pinhole camera created using an aluminum can with a small hole in the side and photographic paper inside, all to capture long-period exposures (weeks, months, years) of the Sun as it moves across the sky each day, images called solargraphs. 

I bought a five-pack in December and used one to shoot a sample shot to share with my grandkids; see previous post. I gave the other four to them as Christmas gifts. 

Earlier this month, we went to see son Chris, his wife Katie and our grandkids Jack and Harper. They have about an acre out in the country. They also have chickens and an Australian shepherd. Not quite a farm but still a very rural setting. I figured this could make for some interesting solargraph images. 

First, Jack and I talked about where a good spot would be for his Solarcan. They have a power pole on the northern edge of their property so we selected as the place to install his camera. 

From this spot, there is a full view of their backyard. The resulting solargraph should have bright lines arcing across from left to right over the shop and chicken coop. Movement of earthbound things generally won't be captured in the image so the solargraph will probably not include people, the dog or chickens.  

Pin marks the spot for Jack's Solarcan. It's oriented towards noon-time solar position. 

The view from Jack's camera. The chicken coop is next to the shop in center of image. 

When it came time to set up Harper's Solarcan, she wanted to have a view of their front yard so we picked a fence post out front. As we were setting it up, she realized she really wanted to have the chicken coop in the view. By mounting the camera a bit higher on the post, the coop is just visible over the fence so she was happy with that. 

Pin marks the spot for Harper's Solarcan, also oriented towards the noon-time solar position.

The view from Harper's camera. Note the tree branches. The chicken coop is just over the fence.

For Harper's Solarcan, one thing that will be interesting is that as the sun traces tracks across the image from lower left, up across the center and then down to the lower right, it will pass behind branches of the trees along the fence line on either side. 

In most solargraphs, the lines traced by the sun have occassional gaps caused by periods of cloudiness. For Harper's, there will also be gaps from the branches obsuring the sun. With the wind blowing them and the trees growing, the gaps may change from day to day, week to week. 

The differences between Jack's and Harper's solargraph images, both in terms of the overall scenes and with the view being mostly clear in Jack's but with Harper's having branches in the view, should make seeing each of these side by side when done very interesting. 

Now that they are up, the plan is to leave them up about 6 months. We didn't get them up until a month after the winter solstice so the lower tracks left by the sun won't be as low as they could have been but each day between now and mid-summer the tracks will go higher up the image. 

I'll post the results later this year so stay tuned... 

Monday, January 31, 2022

Eaton Family Solarcan Project - Phase 1: Gifts

My with sister Donna when I was about 4. 
As someone who who has been a shutterbug since I was in kindergarten (Dad let me take one of his cameras on a field-trip to ride a train in Dallas, even coached me to be sure I was pointing the camera ahead rather than straight out the window so everything wasn't a blur) and as someone who has been a science geek for about as long (when my folks asked me what I wanted to be when I grew up, my answer was "scientist"), I get a bit excited when I find something that blends photography and science. 

With that little tidbit, you can probably understand how thrilled I was to discover a product called the Solarcan, a unique camera created to take a solargraph, a long-duration image of the sun's path across the sky, captured by a simple pinhole camera. The unique thing about the Solarcan design is that there is no negative... the image is captured directly on light-sensitive paper and to "develop" it you just take the paper out of the can and scan it into your computer.

Example of a solargraph by Chuck Miller (flickr)

Given that the Solarcan design is just an aluminum can with a pinhole in it and a piece of photographic paper tucked inside, you might wonder why not just make one on my own. Sure, I could have followed directions readily available online such as these on Instructables. That would have been fine if my goal was to experiment for a few months to work out the right configuration of materials, get the pinhole just right, etc. But I had more immediate plans: I wanted to share this with my grandkids for Christmas. 

So I ordered a 5-pack from Solarcan in early December. They arrived a week ahead of Christmas, perfect timing to shoot one for a week (as it happens, spanning the winter solstice) with the other four wrapped as gifts for four of my five grandkids. The fifth, Owen, is just over a year so not old enough yet for a "Papa project" like this. 

Eaton Solarcan #1  

Although the ideal timeline for a solargraph is to leave it up for about 6 months, from solstice to solstice, so that the sun traces lines across the image from its lowest path in the winter through its highest path in the summer, I figured that at least capturing a week would provide enough suntracks to illustrate what a solargraph could look like. 

On Christmas Day, with all our kids and grandkids over for Christmas dinner, I took Kaili, Jack, Olivia and Harper out back to show them the Solarcan I had installed the prior weekend, oriented towards the south with a view of our back yard. My plan had been to have them help remove the paper from the can, scan it and play around with the results in Photoshop to clean it up. Unfortunately, our can opener wouldn't work with the "beer can" style rim on the Solarcan. However, the following week I got a can opener that worked, "developed" the image and here is the result. 


Not bad for a first pass. I was pleasantly surprised at the amount of foreground detail captured and although the sun tracks from day to day kind of run together, it's definitely wide enough to tell this was shot over more than just a single day. 

That said, there were plenty of lessons learned including:

  • I was a little off in aiming the pinhole so the arc of the tracks the sun traced across the image are shifted to the left. 
  • There is a shadow on the lower left that is from the tab that holds the paper in the can. Next time, doing a better job aiming towards the point of the mid-day sun, we should have the arc of the sun centered and can crop out the retainer tab shadows. 
  • I think when I finally opened the top of the can, the room might have been a bit too bright which may account for the streak from the left side up towards the top. Something else to be more careful about. 
I'll follow up with additional posts on helping each grandkid to set theirs up and later in the year what the results they get look like. I also have a smaller solargraph from Solarcan called a Puck so I'm looking for a unique spot to set it up for half a year or so. 

Stay tuned!