As described in my last post, I was inspired by an APOD entry last December featuring a solar analemma captured by a security camera on someone's driveway to create my own timelapse video tracing the path of the Sun over a year, capturing the distinctive figure eight shape of the analemma as the shadow moves day by day. This project recreates a technique used for timekeeping, calendar making, and as the basis for religious and cultural rituals going back thousands of years. But as with the APOD that inspired it, I'm putting a modern spin on this ancient concept by leveraging programming, computers, digital cameras, photo and video editing software, design software, and 3D printing. In this post, I'll provide an overview of my setup, including how I planned out the project, created a custom gnomon (the part of a solar timepiece that casts the shadow), set up the camera and automation system, and the initial image processing and results.
Decision #1: What to Shoot With
Blink camera
First off, I had to pick a camera to capture each image with. As the subject is outdoors - and the project lasts for a year - using a DSLR like my Nikon D750 wouldn't be feasible. I could easily dedicate one of the IP cameras I have for a year but they aren't weather-proof and they have to be plugged in. Luckily, we have a set of Blink outdoor cameras around the house. They are weather-proof, battery-powered and can be accessed over a network connection. The only concern I had with them is the mount is easy to move which could interfere with having the same point of view for every image over the course of the year. I solved that by 3D printing a new mount that I could lock in place with a set screw.
Decision #2: Where to Shoot
My first thought was to do something like in the referenced APOD... shoot to the north with the shadow to track being cast in front of the camera with the Sun shining from behind. I even considered mounting the camera so that its own shadow would be what traces out the analemma. However, while our house faces north-northeast, we have 6 huge cedar elm trees out front; during the summer any shadow cast from the edge of the house would be lost in the shade of the trees. Given that, I settled on shooting in the back yard.
Decision #3: When to Shoot
View to be captured
The decision of when to shoot and where to shoot go hand-in-hand. Deciding to shoot in the back yard was fine but incomplete till I figured out what time of day to shoot. Long story short, as we already have a Blink camera on our side fence, I figured out that as that fence runs on a line that's about 153 degrees (approximately south-southeast), I could shoot at just after noon each day and the shadow would trace out the figure eight of an analemma on the ground just on our side of the fence and in the field of view of that camera.
Decision #4: What to Shoot
Gnomon on fence
Although I could have mounted just anything on top of the fence to cast a shadow, I took advantage to having access to a 3D printer and designed and printed my own gnomon in the form of a stylized Sun mounted on a post. It was printed in black but I took yellow Plasti-Dip both for a "sunny" look and also to give it a bit of additional protection against the elements.
Decision #5: How to Shoot
Early photographic attempts to capture a solar analemma in the sky with a film camera required incredible dedication, shooting at the exact same time of day, one day a week or every few weeks for an entire year. Because I am creating a timelapse video rather than a composite photo, I need to capture an image more frequently (every day) so I decided to automate the process. I have a home automation solution called Home Assistant. With it, I was able to write a script that takes a photo with the Blink camera in the back yard at 12:30pm (1:30pm during Daylight Saving Time) every day. The system also records metadata about weather conditions (overcast, sunny, etc.) in a text file, storing both the images and data on a home computer for later use in assembling the video.
Progress To-date
Although I only recently began posting about this project, I started planning it in December and started shooting the day after the winter solstice which fell on December 21st. Things are going well but there have been a few bumps in the road:
It turned out that the shadow cast by the first gnomon I created was a little too small so I redesigned a larger version and replaced the first one with it at the end of December.
Although the camera mount is locked in place, it appears that the image framing shifts a very small amount over the course of several days. My guess is that the weather going from sub-freezing to springtime temperatures, the plastic mount is expanding and contracting, affecting the alignment of the camera. Thankfully, the difference from image to image is small enough that I can align all the images using Photoshop so that they don't shift from day to day.
Early on, rain left water drops on the camera lens that affected the images but we've had quite a bit of rain since then and it hasn't happened again. If it does, I may need to add a hood to the camera mount.
In spite of these issues, my first pass at assembling the images into timelapse format looks promising. This version has two sections. In the first, watch for the yellow dot on the ground... it overlays the gnomon's shadow. In the second section, watch that same area of the ground and you'll see the shadow of the gnomon trace out the beginning of an analemma.
Timelapse showing 6 weeks of daily shadow captures (with gnomon shadow highlighted and with raw video)
As you can see, at just 6 weeks, there is not enough of the analemma yet to make out its distinctive figure eight shape but a pattern is beginning to take form. And there are some oddities in the video - gaps from overcast days (and some rain) and other things moving besides the shadow cast by the fence and gnomon (leaves, chairs, our dog, etc.) - all things I expected given my past experience creating timelapse videos.
But how exactly did I create the gnomon? What tools did I use to automate the daily image capture? And what techniques am I using to process and align the images? To create the video? In my next post, I'll dive into these technical details and more, sharing the nuts and bolts of my analemma timelapse setup for those who want to explore further.
Update: One Year Later
Having had an issue with the video camera a month or so after this post was originally made, I've postponed wrapping up the project, intending to have the final video run from the June solstice of 2025 through the June solstice of 2026. Stay tuned!
If you follow the Astronomy Picture of the Day (APOD) like I do, you may have seen the December 2024 entry showcasing a photographer in Colorado who used a security camera to track a shadow on their driveway at the same time each day for nearly a year. As the seasons changed, this shadow traced out a distinctive figure-eight pattern known as an analemma. I found the simplicity and ingenuity of using readily available technology to capture such a complex phenomenon fascinating.
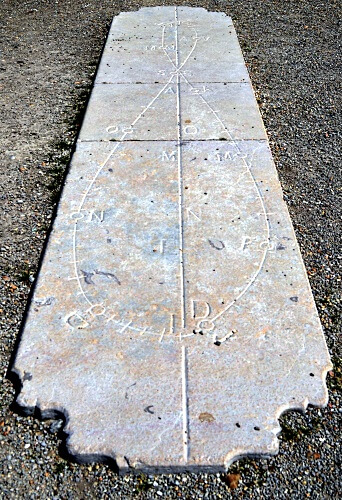
What caught my attention wasn't just the clever use of a security camera to track the sun's movement, but how it connected ancient and modern ways of marking time. Most of us have seen sundials in gardens or parks, where shadows mark the time of day. Fewer people are aware of solar calendars, like the Noon Mark on the south face of the Royal Observatory in Greenwich, which uses carefully placed markers to track a shadow's position at noon throughout the year, forming the same figure-eight analemma shape. In the video above, here was someone using modern technology to capture the same astronomical pattern that astronomers and timekeepers have been tracking for centuries.
Inspired by this APOD, I decided to capture a shadow analemma using technology myself. I'll dive into the details of that in my next post, but first, I’d like to share a bit of historical and scientific context.
The word analemma comes from ancient Greece, where it originally referred not to the figure-eight pattern itself but to the mathematical techniques used for calculating the Sun’s position in the sky. It was derived from the Greek word analēmma, which referred to the support or pedestal of a sundial. In astronomical terms, however, analēmma described the methods used to account for the variations in the Sun's apparent motion throughout the year. This early use of the term was central to creating accurate solar calendars and tracking celestial events.
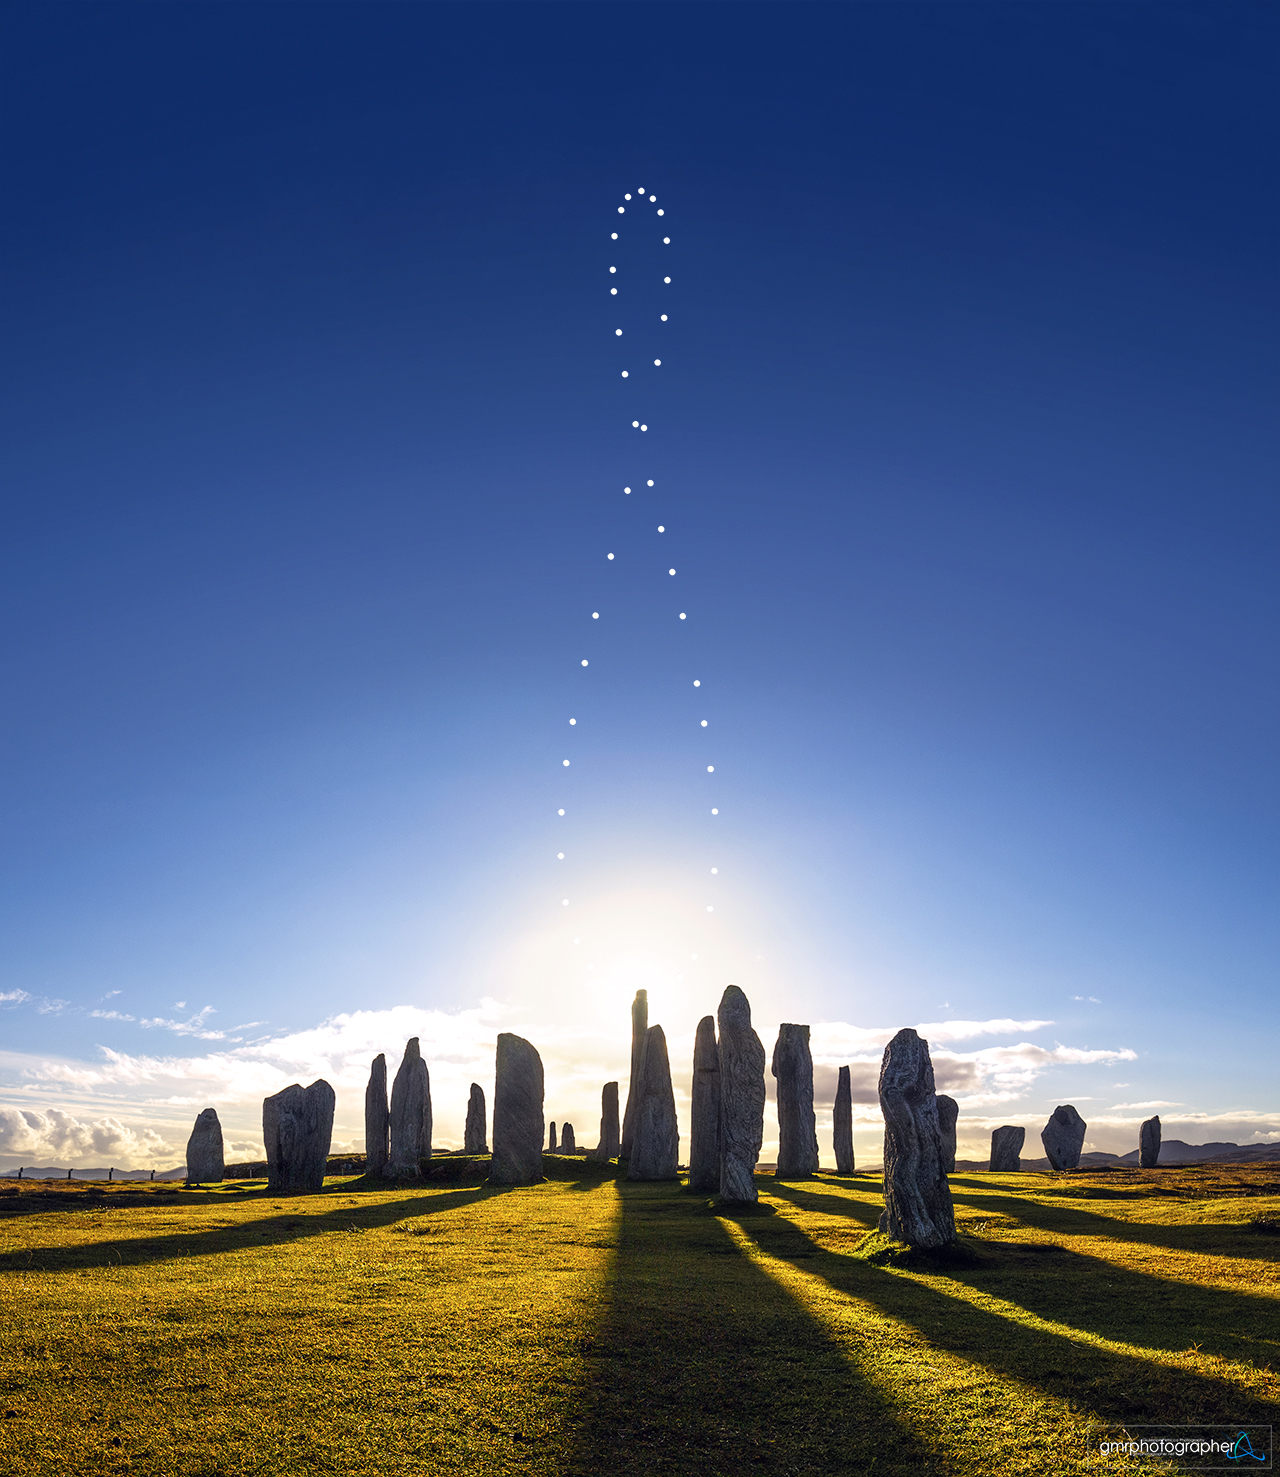
In modern usage, analemma now refers to the distinctive figure-eight pattern traced by the Sun's position in the sky when observed at the same time each day throughout the year. This pattern arises from two astronomical phenomena: the tilt of the Earth's axis and its elliptical orbit around the Sun.
The Earth's axial tilt of 23.5 degrees is the easy part of the pattern to understand. Because of this tilt, the Sun appears lower in the sky during winter and higher during summer in the Northern Hemisphere, with the opposite occurring in the Southern Hemisphere. If this were the only factor, the analemma would form a vertical line rather than a figure-eight, as the Sun's position in the sky would rise daily between the winter and summer solstices and descend daily between summer and winter.
However, because the Earth's orbit around the Sun is an ellipse, it is closer to the Sun around January and farther from the Sun around July. According to Kepler's Second Law, an orbiting body moves faster as it is getting closer to the body it orbits and slower as it is moving farther away. When the Earth is speeding up, the Sun appears a little ahead of its average position in the sky (i.e., where it would be if Earth's orbit were a perfect circle) and, as it is slowing down, it appears a little behind its average position. This, combined with the Sun's changing elevation through the seasons, creates the figure-eight pattern.
Long before cameras could record the Sun's position in the sky, ancient civilizations from Egypt to China used a down-to-earth approach to track time: observing shadows cast by the Sun—patterns that, over time, reflected the effects of the analemma. They built elaborate structures specifically designed to mark the passage of days and seasons by the position of shadows. These structures were not just timekeeping tools; they were woven into religious and cultural traditions, guiding agricultural cycles and celebrations.
In the modern era, photographers have found a new way to capture the Sun's path: sky analemmas. By mounting a camera in a fixed position and taking photographs of the Sun at precisely the same time each day throughout the year, they create composite images showing the Sun's position tracing a distinctive figure-eight pattern across the sky. These images have become iconic astronomical artworks, requiring dedication and precise timing to create. However, they offer a more abstract way to visualize the Sun's movement—one made possible by photographic technology.
Shadow analemmas are particularly intriguing because they translate this celestial pattern into something tangible. While sky analemmas show where the Sun is, shadow analemmas reveal the effect of the Sun's position on our immediate environment. By following the Sun's path through the shadows it casts on familiar surfaces, we can experience the same astronomical phenomena that guided ancient timekeeping. Shadow analemmas can bridge historical traditions and modern science.
In this project, I seek to unite ancient astronomical practices with modern technology by developing an automated system to capture a year-long shadow analemma. Throughout this series, I'll explore the technical details of my setup, the challenges I've encountered, and the insights I've gained. Join me on this journey to explore the intersection of astronomy, photography, and the rhythms of everyday life.
Want a Zoozve Poster? Click on the image to buy one from Alex
What's a Quasi-moon
Right? What the heck are they? A quasi-moon of a planet is an asteroid that remains in the general vicinity of its planet. Unlike a moon, a quasi-moon doesn't orbit the planet itself but orbits the Sun, just with a path similar to that of the planet. If you want to learn more about quasi-moons, check out the Wikipedia quasi-satellite article.
BTW, if you have seen the latest news reports about Earth having a mini-moon for two months as asteroid 2024 PT5 is captured by Earth's gravity, you might wonder about the difference between a mini-moon and a quasi-moon. See the Wikipedia quasi-satellite and temporary satellite articles for the details but basically quasi-moons have a (mostly) stable orbit and mini-moons don't.
The Zoozve Story
I first learned about quasi-moons listening to a viral podcast episode about something called Zoozve. You should check out the Zoozve episode yourself, both for the full story and more details on this unique object, but the gist of it is that the co-host of Radiolab, Latif Nasser, was looking over a solar system poster bought for his son and noticed the name Zoozve, shown as a moon of Venus. Having never heard that Venus has a moon, he did his thing as an investigative reporter and learned that it was a quasi-moon. He also discovered that Alex Foster, the graphic artist who created the poster, had mistakenly shown the object's provisional designation, 2002VE (technically, 2002 VE68) on the poster as ZOOZVE. Latif eventually pitched the idea of submitting the name Zoozve as the official name of 2002 VE68 to Brian Skiff, the scientist who had discovered it. Brian submitted the name to the International Astronomical Union (IAU), the scientific body responsible for governing the names of astronomical objects, and it was eventually approved.
The Naming Contest
Orbital path for 2004 GU9 Click to enlarge
Inspired by the naming of Zoozve, Radiolab and the IAU kicked off a contest this past May to name one of Earth's quasi-moons, the asteroid 164207 (2004 GU9), as a way for the public to learn more about quasi-moons and the ways in which the naming process connects culture and science. You can read more about the contest here. There aren't many quasi-moons and only a few have official names, the rest just have a provisional designation, so it is pretty cool for the public to have an opportunity to suggest the name for one.
The deadline for submissions is today so if you weren't already aware of the contest, there are only hours left if you want to make a submission. However, you can still participate as Radiolab and IAU will pick 10 finalists in October and then during November and December the public will be able to vote on which of these they think will be the best name for 2004 GU9. The winning name will be announced in January, 2025.
Getting Involved
As an amateur astronomer and STEAM advocate, the opportunity to be involved in naming an astronomical object really intrigued me. I've spent time off and on over the past few months working on this. First I had to come up with a name. It had to be from a mythological source (excluding types of names used for things like planets) and it couldn't have already been used as the name of another celestial object. The name I selected is Zephyrus.
After coming up with the name, I had to draft a citation, the official description that will be recorded with the name, and a justification, my case for why they should choose my submission. Drafting those involved numerous rewrites. In the course of this I did leverage some online resources, even using AI for idea generation and suggestions on improving the writing, but ultimately the end result is my own work. See below for what I submitted.
Name:
Zephyrus
Source:
Greek Mythology
Citation:
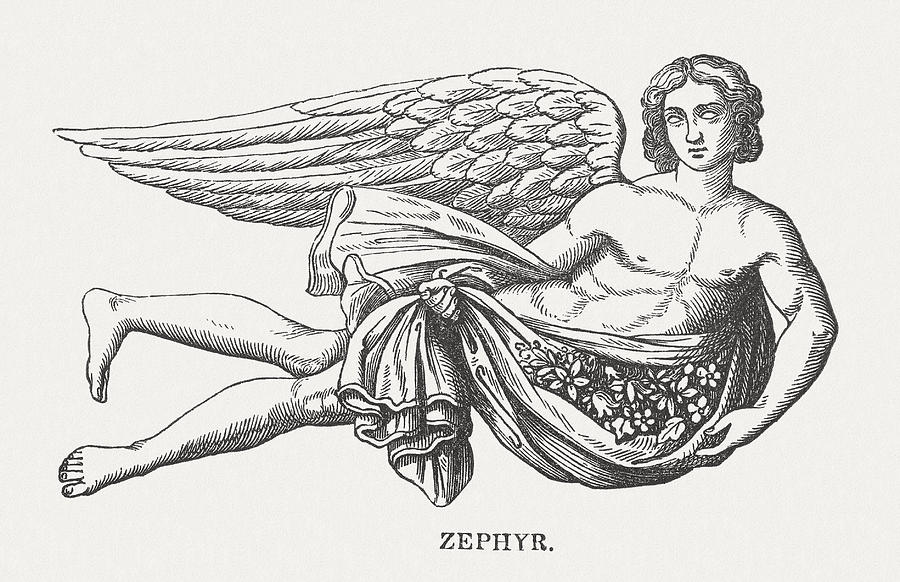
Zephyrus is the Greek god of the west wind, one of the four Anemoi, the wind gods. He symbolizes renewal, life, and the gentle forces of nature. This name was selected through a contest organized by the IAU and Radiolab to name a quasi-moon of Earth.
Rationale:
Zephyrus, one of the four Anemoi of Greek mythology, was the god of the West wind. Although generally associated with gentle breezes, Zephyrus also had a wilder side, sometimes referred to as stormy or ill-tempered. This dual nature, a balance between gentle influence and untamed power, is also reflected in the unique orbital properties of quasi-moon 2004 GU9. Its orbital path has a subtle grace and beauty yet represents possible danger, reflected in its classification as a Potentially Hazardous Asteroid.
2004 GU9 is held in its orbit by the Sun, echoing Zephyrus' struggle with Apollo, the Sun god. Both the wind god and the asteroid have been subject to the pull of a more powerful force. Just as Apollo won the affections of Spartan prince Hyacinthus over Zephyrus, the Sun dominates the movements of 2004 GU9. These parallels illustrate a delicate balance between autonomy and influence, where smaller entities make their way under the sway of greater powers. Both cases reflect struggle and equilibrium.
Choosing the name Zephyrus for quasi-moon 2004 GU9 would pay tribute to the complexity and balance of Earth’s winds and of the movements of cosmic bodies. It would also honor the imaginative spirit of this naming contest. Just as the naming of quasi-moon Zoozve was the result of a creative spark flowing from discovery, Zephyrus is often associated with spring and growth, with the creation of the new.
If you're interested in learning more about Zephyrus, you can check out the Olympioi or Wikipedia articles on him for additional information.
Hopefully, my submission is selected as one of the finalists. If it does, I'll do a follow-up post with information on how to vote. I hope you'll consider voting for Zephyrus!
Whether or not Zephyrus ends up being chosen, it's exciting to be part of this naming process.
I'd love to hear if you have an idea for a name for 2004 GU9, have feedback on Zephyrus as a name for it, if you have questions or comments on quasi-moons or if you have questions about how and why astronomical objects are named. Drop a note in the comments - let's chat!
One of my primary goals for this total solar eclipse was to capture a variety of telescopic views of the eclipse. The similar goal I had in 2017 was spoiled by overcast skies that resulted in a mad dash down the road with Beau Hartwig chasing clear skies. Seeing totality with my own eyes meant giving up on my photographic goal. I don't regret that for a minute but I was thrilled that this time the skies cleared for us just in time for the "Big Show".
To avoid having to split my attention between experiencing totality and taking pictures, I used our old 2012 MacBook Pro running a software package called Solar Eclipse Maestro to control the camera, snapping pictures at pre-defined times and exposure settings. SEM worked flawlessly and had it not been for a user-error on my part (which I'll cover in a future post), I would have captured everything I planned for. As it is, I still was able to capture most of what I planned including:
Diamond Ring effect (though not as spectacular as that from other people due to my snafu)
Although the images captured were as good or better than I hoped, post-processing them to fully bring out the available detail is a rather complicated thing involving a variety of software tools. I am still working on that but I wanted to go ahead and share some initial edits.
The image above is a blend of each of the 19 different shutter speeds used to capture images to submit to the Eclipse Megamovie project. They were taken during totality to capture as much fine detail of the solar corona as possible. The project team will use the calibration frames to pull out even more detail than appears in this image but, for my first pass at this I used some basic stacking techniques in Photoshop. Click on it to see enlarged... isn't the level of detail incredible?
I'm also including some cursory edits I've done of a few other images below including a partial phase image and a picture of Baily's Beads. What I am the most excited about though is the spectacular solar prominences that appear in the Baily's Beads shot. Wow! Even more incredible is that the largest one was visible naked-eye.
Once I've had time to go through the rest of my images and finish some of the more complicated editing processes, I'll share more of these. I'll also do a follow-up post on my equipment and what went into capturing these images.
I hope you got a chance to see totality for yourself but, if not, please enjoy my first pass at sharing the view with you.
Late in the partial phase of the eclipse. Note the sunspot in the center!
This is a aerial view of the arrival and departure of the Moon's shadow, the lunar umbra, over Ellis County Texas during the total solar eclipse on April 8th, 2024.
We launched the drone just ahead of totality programmed to hover till the arrival of the lunar umbra and then orbit to film the horizon during totality.
The sky got darker than I remembered from the 2017 total solar eclipse but the way things looked as the umbra arrived, growing darker first from one direction, and then as it departed, growing light first from the direction it had arrived, was the same as to 2017.
Thankfully, we had relatively clear skies but the effect would have been similar even if it had been completely overcast. I had hoped that as the drone orbited it would capture the full 360 degree sunset effect along the horizon but it was too cloudy. You can get just a sense of it at the 58 second mark in the video.
The total phase of the eclipse at this location was 4 minutes 16 seconds. However, as the focus for this video is on the visual experience of the sky getting dark with the arrival of the umbra and growing light again with its departure, the duration of totality is edited down to about 22 seconds. As the Sun was about 65 degrees above the horizon, it was not possible to include the eclipsed solar disk in this video.
PS.
After posting this, I ran across a similar drone video from 2017 that doesn't show the lunar umbra arrival and departure but it does show the 360 degree sunset effect. Check it out here.
Details:
Filmed from a DJI Mini 2 drone using DroneLink flightplan
As I mentioned in my last post, I have a lot of irons in the fire for the April 8th 2024 total solar eclipse! One of those is all about viewing the overall eclipse: building a "Solar Funnel" or "Sun Funnel".
Our old telescope, a Parks 60mm refractor we bought about 30 years ago, happens to be on an equatorial mount and has a sidereal motor. All that means is that I can point it at something in the sky and the motor ensures that the object remains in the eyepiece (with only an occasional need to adjust the direction the telescope is aimed).
Normally, we would never point a telescope at the Sun without a solar filter but in this case it is OK: we won't be looking directly into the eyepiece. Instead what would appear in the eyepiece is projected onto a piece of rear-projection screen material, allowing us to see it safely. Better yet, more than one person can watch at the same time!
We have used a similar approach in the past, projecting the Sun onto a white piece of poster board to check out sunspots but that was kind of cumbersome. This Sun Funnel design is much easier to use.
Ironically, while the Sun Funnel does a great job of showing the solar disk including sunspots and the Moon taking a bigger and bigger "bite" out of the Sun during the partial phase of an eclipse, it won't be something we'll pay any attention to during the "Big Show"; it will be useless during totality since the Sun will have disappeared behind the Moon!
Still, the partial phase of the eclipse lasts hours compared to totality which only lasts minutes so the Sun Funnel will get a lot of use on the 8th.
If you have a small telescope (even if it doesn't have a motorized mount) and you'd like to build your own Sun Funnel, they are pretty simple to make and don't cost much, either. One of the most commonly referenced sets of instructions is this one from American Astronomical Society, Nightwise.org and NASA:
It has full instructions on building it, how to use it and details like the calculations for how to determine the right size eyepiece for using a Sun Funnel on your telescope.
I finished ours the other day but today was the first time the Sun was out long enough for me to test it. If you look closely at the second picture (click on it to see enlarged), you'll see that the bright circle in the middle is the Sun, pretty much filling the entire field of view. You'll also see a number of sunspots, several just above center and another one down at the bottom.
Whether you build your own Sun Funnel or not, I hope you will be someplace in the path of the eclipse on April 8th and wish us all "clear skies"!
Tomorrow's the day! As mentioned in my last post, tomorrow an annular solar eclipse is visible across a stretch of the western half of the North American continent.
For the rest of the country - including Dallas where I live - we won't get to see the Ring of Fire but we'll still get to observe a partial solar eclipse.
Screen shot from Stellarium
Here is what the Sun will look like at maximum eclipse for Dallas (about 11:52am local time). Although that area blocked by the Moon in this simulation looks blue, keep in mind that this is a new moon which means we don't see any illuminated lunar surface since the Moon is in between us and the Sun.
While you would think that with this much of the Sun covered up the amount of light we see would be low enough to be safe to view without eye protection, it's not! Except during the totality phase of a total solar eclipse when the Moon is completely blocking the solar surface, it is not safe to look directly at the Sun. If you are interested in seeing the eclipse tomorrow, only do so if you have a set of solar eclipse viewing glasses from a reputable source. If you don't already have eclipse glasses it may be too late to get some but here is information from NASA on safe viewing resources.
Personally, I am treating this eclipse as a trial run for the total solar eclipse that will pass over North Texas on April 8, 2024. I plan to capture the partial eclipse from start to finish using my Nikon D750 and EvoStar 72ED refractor telescope with solar filter mounted on my Star Adventurer tracker. I'll leave it running from well before the eclipse through past the end of the eclipse, capturing a couple of shots a minute. Hopefully, the result will be a handful of good shots of different stages of the eclipse and possibly a sequence of shots I can use to make a timelapse video of the eclipse from start to finish.
A lot has to happen for this to be successful - a good polar alignment of the telescope the night before, being able to get a good focus of the Sun once it peeks above the trees, the weather forecast being accurate (i.e., no clouds) - but even if it doesn't work out as planned, it will still be good practice for April!
Here are shots of my equipment set up for a test run today.
That solar filter is critical for safely photographing the Sun!
The tracker keeps the telescope pointed at the Sun as it moves across the sky.
I hope you get to see the eclipse, too. Just be sure to be safe when viewing the Sun!
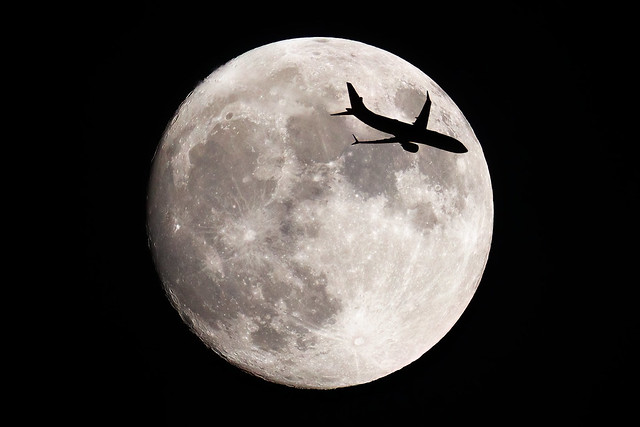
After my last post about capturing a jet flying in front of the Sun, I saw this image Brandon Ghany posted on Flickr of a jet crossing in front of the Moon and what caught my attention is how much smaller the jet is than in my video.
From Brandon's description, this jet was flying at about 12,500 feet. Clearly, the jet I caught was flying much lower. But how low? I was curious enough to try figuring it out.
The first factor to consider is that the Sun and Moon are similar but not exactly the same size from our viewpoint. Actually, the distance to the Moon varies a little at different points in its orbit so sometimes it is closer and thus a bit larger than the Sun (necessary to have a total solar eclipse) and sometimes it is farther away and thus a bit smaller than the Sun (leading to views like the Ring of Fire of an annular eclipse such as the one on October 14th this year). But in general terms, they are both roughly a half a degree across viewed from Earth. That means if Brandon had captured a jet at 12,500 feet passing in front of the Sun instead of the Moon, his image would have looked similar, at least in terms of the relationship between the size of the jet and the size of the celestial orb it passed in front of.
The second factor is that while I know the angular size of the sun (reported by Stellarium as 31.68 arc minutes at the time of my video), for me to determine things like the jet's altitude, I need to know the jet's angular dimension, too.
To calculate this, I captured a single frame from my video, cropped and rotated it then used drafting software (FreeCAD) to measure the relative difference between the width of the jet's fuselage and the width of the Sun. The ratio came out to 55.25% which means the width of the jet body is 17.5 arc minutes.
So, how did you do in high school or college trig class? I muddled through but that was also so long ago, I just don't recall the exact formula to use. Thanks to Google, though, it was pretty easy to find what I needed.
d = ( w / θ ) * 60
Simple, right? Well, except I'm missing one variable: w, or width. Google to the rescue again. If I assume that this jet was something like a Boing 737 or an Airbus 320, both pretty common models used by airline companies flying out of DFW and Love Field, then the width of the fuselage is approximately 13 feet. Plugging that into the formula as w and converting arc seconds to degrees and using that as θ, that tells me that the jet was approximately 2,674 feet away when it passed over our neighborhood.
But was that how high it was flying? Not exactly since it wasn't directly over my backyard. Again checking Stellarium, I found that the Sun's altitude (its angle above the horizon) was about 62.65 degrees.
Dusting off more trigonometry, that gives me two variables of a right triangle, the angle and the hypotenuse. From those, I can calculate the jet's elevation (the opposite side of the triangle) and the distance over ground to the jet's position when it transited the Sun.
o = h * sin(θ)
a = h * cosin(θ)
Solving these is pretty straightforward with a modern calculator or using spreadsheet software like Google Sheets. Note that these formulas require the angle to be expressed in radians but spreadsheets have a function for that, too, so you don't have to remember the formula for converting degrees to radians:
θ radians = θ degrees * π / 180
So what's the answer? Based on the numbers above, at the time it passed in front of the Sun that jet was flying at an elevation of approximately 2,377 feet and its position over land was about 1,225 feet from my backyard, about a quarter of a mile to the southwest.
I would have thought the jets flying over East Dallas would be higher than that but the data and formulas say it has to be somewhere between 2,000 and 3,000 feet up. To see for yourself, make a copy of my spreadsheet and play around with what happens when you change the jet fuselage width (cell B7). Even if you change it to the size of a jumbo 747, 21.3 feet, the calculated elevation of the jet is still well under 4,000 feet.
Another interesting exercise would be to play around with the ratio of the jet fuselage width to the orb size to see what it has to be for the jet in Brandon's image to be flying at 12,500. Give it a try.
Remind you of one of those math word problems you hated solving in school?
Yeah, but pretty cool, huh?
Note
It's been decades since I was in school so if you find that I've made a mistake in my calculations, I'd be happy to hear about it in the comments.
UPDATE: I've replaced the previous video with a new version that includes the sound of the jet flyover from the original audio track.
While out filming the sun to practice for the total solar eclipse next April, I was photo-bombed by a jet!
The technical term is "transit", when an object crosses in front of an astronomical body. There is plenty of air traffic over our house with Love Field and DFW serving the area so I guess this shouldn't have surprised me but observing a transit (like this one, or this one) takes being in just the right place at just the right time so it's a pretty rare thing to have happen.
One reason I happened to be shooting at this time is that I'm working out exactly what equipment I'm going to be shooting with for the total solar eclipse. This video was shot using:
Sky Watcher EvoStar 72ED refractor
Baader film solar filter
2" mirror diagonal
Celestron 1.25" 2X Barlow
T2-ring
Nikon D750 DSLR
Focusing with DeepSkyDad AF3 autofocuser
Sky Watcher Star Adventurer 2 tracker
Radian carbon fiber tripod
I have a new 2" 2X Barlow and I plan to shoot straight-through (i.e., no diagonal) but I am still working out what combination of components will allow me to properly focus with the new Barlow. Once I have that worked out, I'll start working on automating my astrophotography workflow using a small computer (a Raspberry 4 running software called StellerMate).
The quality of this video isn't great but that's basically because I was focusing (pun intended) more on getting the equipment working right than on the finer details. Next April may see a long ways off but it will be here in the blink of an eye and as I know from my experience in 2017, being ready to catch a full eclipse end-to-end, most importantly those few minutes of totality, takes an incredible amount of practice. So, I'll be shooting pretty regularly over the next few months to make sure I have everything working perfectly.
Anyone have a way to ensure that April clouds don't spoil the eclipse for me, er, us?
Seriously, you'll notice from the video that the Sun is pretty active with quite a few sunspots showing. Over the next few weeks, if I can get a day with good "seeing" (i.e., where there is minimal air turbulence), I'll get some shots with lots of detail, everything in focus, and the sunspots should jump off the page at you. Stay tuned!
Warning
NEVER look directly at the sun without proper protection. This video was shot using a telescope and camera equipped with a special solar filter.
As covered in previous posts, late in 2021 I discovered a product called the Solarcan, a pinhole camera created using an aluminum can with a small hole in the side and photographic paper inside, all to capture long-period exposures (weeks, months, years) of the Sun as it moves across the sky each day, images called solargraphs. I bought a five-pack of Solarcans in December 2021 and gave four to my grandkids as Christmas gifts.
In the Phase 2 posts, I covered helping my grandkids set up their Solarcans. The plan for each one was to have them up about 6 months. For the one Kaili and I put up (see this post), the plan was to leave it up till at least the winter solstice but she decided she wanted to leave it up longer. Here are views of her Solarcan taken in November including a view from the Solarcan.
In the initial scan, the sky and the arcs traced by the Sun are dark and the foreground is light. The reason is that the photographic paper reacts to light by darkening, resulting in a negative image. The bright spot on the sides of the image are the result of tabs on the inside of the Solarcan that hold the paper in place; because they overlap the paper, they block the light, preventing the paper from darkening.
The next step in the development process is to convert the image from negative to positive. After that, the goal of processing is getting an image in which some of the details come out (e.g., adjusting exposure and contrast) and adjusting color and other variables to get something that looks interesting. Here is the final result.
Like the solargraphs done by Olivia, Jack and Harper, the dominant feature is the arcs across the top representing the path through the sky of the Sun. Long, bold lines are from sunny days and thin lines or ones with gaps are from cloudy or partly-cloudy days. After the winter solstice, the Sun started passing a little higher each day so I think the fact that it was tracing back over the days leading up to the solstice is why the lower lines are so much brighter (i.e., twice as much exposure in those areas).
The thing that is cool about this one is the basketball backboard. Of course, that was what we were hoping for (see photos of the view from the Solarcan). What we hadn't planned for is there being two. But there is just one backboard (at least on this side of the cul de sac) so what's up?
Notice that it's not just the backboard that shows up twice. So does the light post. And if you look closely, there are two images of other things too... the trees in the distance and the house across the street. What must have happened is that at some point during the time the Solarcan was active, it got bumped which left the pinhole pointing a little bit to the side. The "double-exposure" effect that resulted is similar to what happened with Jack's and Harper's. I imagine that it's not uncommon for a Solarcan left up for months (or years) to get moved, whether it's by an animal, the weather or maybe even a basketball. :-)
As always, click on an image to see it full screen.
As covered in previous posts, late last year I discovered a product called the Solarcan, a pinhole camera created using an aluminum can with a small hole in the side and photographic paper inside, all to capture long-period exposures (weeks, months, years) of the Sun as it moves across the sky each day, images called solargraphs. I bought a five-pack of Solarcans in December and gave four to my grandkids as Christmas gifts .
In the Phase 2 posts, I covered helping my grandkids set up their Solarcans. The plan for each one was to have them up about 6 months. For the ones Jack, Harper and I put up (see this post), the 6 months was up on July 17th. Here are views of the their Solarcans as we prepared to take them down on July 29th:
Jack's Solarcan
Harper's Solarcan
One of the things we noticed is that each of their Solarcan's were just a little bit crooked; they were straight when we put them out. More about this below.
The initial scans look a little odd... the sky and the arcs traced by the Sun are dark and the foreground is light. The reason is that the photographic paper reacts to light by darkening, resulting in a negative image. The bright spot on the sides of each image are the result of tabs on the inside of the Solarcan that hold the paper in place; because they overlap the paper, they block the light, preventing the paper from darkening.
The next step in the development process is to convert each image from negative to positive. After that, the goal processing is getting an image in which some of the details come out (e.g., adjusting exposure and contrast) and adjusting color and other variables to get something that looks interesting. Here is the final result.
Jack's finished solargraph
Harper's finished solargraph
As covered in the Phase 2 post, Jack's Solarcan was mounted in their back yard with the shop and chicken coop in the foreground while Harper's was mounted in their front yard with a view of the house in the foreground (though the chicken coop was visible over the fence). If you look closely, you can see all those details in these images.
As with other solargraphs (including Olivia's), the lines traced across the top of the image represent the path of the Sun each day. These solargraphs were started about a month after the winter solstice so the earliest lines are the lower ones, reflecting the low path across the sky of a winter Sun. As time passed, new lines appear higher and higher on the image. Gaps appear where there were days (or parts of days) in which the Sun was obscured by clouds. One reason there are differences in these two solargraphs (even though they were mounted relatively close together) has to do with another thing that blocked the sunlight: tree limbs. You can see the trees more prominently in Harper's solargraph. You can see in the first images above that there are trees closer to where it was mounted compared to Jack's.
The other unusual aspect of these images is the strange "double-exposure" appearance, most obvious on the right side of Jack's image where there is a second, lighter horizon above the darker horizon below and the lighter one is at an angle. As mentioned above, we installed each Solarcan vertically on a post but when we took them down, each was just a little crooked.
We aren't sure what happened but it seems clear that about 4 months (roughly 2/3rd of the way through the exposure) something knocked each can over a little. When that happened, effectively a "new exposure" was started. It's hard to tell but the effect even shows up in the lines traced by the Sun (the highest ones are a bit blurred where ones traced after the cans were knocked over overlap the earlier lines).
Although our initial reaction was that this was an error, that the solargraphs were "messed up", the more we talked about it, the more unique it seemed. Jack, Harper and I now consider these to be extra special, very unique!
As covered in previous posts, late last year I discovered a product called the Solarcan, a pinhole camera created using an aluminum can with a small hole in the side and photographic paper inside, all to capture long-period exposures (weeks, months, years) of the Sun as it moves across the sky each day, images called solargraphs.
I bought a five-pack of Solarcans in December and used one to shoot a sample shot to share with my grandkids; see Phase 1 post. I gave the other four to them as Christmas gifts.
In the Phase 2 posts, I covered helping my grandkids set up their Solarcans. The plan for each one was to have them up about 6 months. For the one Olivia and I put up (see this post), it turned out we needed to take it down a little early. On July 9th, we took it down. Here is the raw scan.
Although the arcs traced across the sky by the sun are pretty easy to make out at the top, they do look a bit weird. One reason is that this photo, captured with a camera created with a piece of photographic paper inside a can with a pinhole on the opposite side of the can, is a negative, i.e., things that are bright appear dark and vice versa.
So, the first step in processing a Solarcan solargraph after scanning it is to convert it from a negative to a positive. From there, everything else is about getting an image in which some of the details come out (e.g., adjusting exposure and contrast) and adjusting color and other variables to get something that looks interesting. The full workflow for this is described in the Solarcan instruction booklet.
With Olivia's, I played around with two different color schemes, one blue and one magenta. Olivia likes the magenta one best. Here they are.
On the left is their fence with the neighbor's trees just beyond. On the right is their house including the chimney at the far end of the roof. In the center is their patio with furniture, a grill, etc.
As for streaks across the top, those represent the path of the sun arcing across the sky from East to West every day during the 140 days the Solarcan was up.
As described in the earlier post, the gaps are the result of weather, specifically clouds. Bright, sunny days left a full arc from one side the to other. Overcast days left dark arcs where bright enough sunlight didn't hit the photographic paper to leave an imprint. Partly cloudy days resulted in arcs across the solargraph with gaps here and there.
By the way, the reason the arcs of the Sun disappear off the top of the page is just because we mounted the Solarcan vertically and as the Sun got higher in the sky during mid-day, the light from it didn't fall directly on the photographic paper. If we had mounted it angled up slightly, then we would have gotten the full path of the Sun each day.
Next up, I'll post about developing the solargraphs for Jack and Harper's Solarcans which we took down this week. Kaili's will stay up until about Christmas. Stay tuned for more images!
Earlier this year, we started on the journey to replace our older telescopes, a Parks 60mm refractor (currently for sale) and an Orion 8" Dobsonian reflector, with something lighter and smaller. The new telescope is a Sky Watcher Evostar 72mm ED apochromatic refractor. It is under 18" long and only weighs a touch over 4 lb so it's very portable. On a solid mount and using our Sky Watcher Star Adventurer tracker, it makes a very nice platform for both visual and photographic views of the sky.
The telescope itself is optimized for viewing large but dim structures like galaxies and nebulae but with the right optics it works well for wide-field views of the planets, the Moon and the Sun. Of course, for solar viewing, it takes more special equipment. As with our other telescopes, I opted for one of the more affordable solutions, a filter made of Baader solar film. I had ordered Baader film from the Baader Planetarium but I needed a holder to fit the new Evostar. Instead of creating one from scratch out of cardboard as I did for the 2017 Total Solar Eclipse, I searched online and found a design on Thingiverse. Thanks to Dari Esfahani for creating it for me on his 3D printer.
Here are shots of the finished filter and the new telescope.
On Friday, I set up the telescope and filter in the backyard. The view was great as there is plenty of sun spot activity right now (see SpaceWeather.com). I grabbed a shot through the eyepiece with my phone as it was too hot (105°) to take the time to mount my camera on the telescope. This morning before it got so hot, I tried again with the camera mounted on the Evostar. So, here are the "first light" and "second light" shots for the new solar filter.
Taken with Pixel 5 cell phone through eyepiece on Evostar 72ED
Taken with Nikon D750 mounted on Evostar 72ED
The shot taken with my phone isn't quite as clear and it has some odd artifacts from how the phone camera processed the image but otherwise, it isn't too bad. The shot through my Nikon D750 is sharper though I was a bit rushed and I think I can get even sharper focus the next time. As for the differences in the sun spots between the two images, it is in part because the orientation of the phone camera yesterday vs. the Nikon this morning plus a small difference in the size and location of each sunspot due to the time that had elapsed between each shot.
With the new solar filter, I'll be spending more time watching and photographing the surface of the sun. Stay tuned!
As covered in previous posts, late last year I discovered a product called the Solarcan, a pinhole camera created using an aluminum can with a small hole in the side and photographic paper inside, all to capture long-period exposures (weeks, months, years) of the Sun as it moves across the sky each day, images called solargraphs. See Eaton Family Solarcan Project - Phase 2: Olivia for more on solargraphs and the beginning of our adventure with Solarcans.
Recently, we spent the day with our oldest granddaughter, Kaili. While at their house to pick her up, she and I installed her Solarcan.
As with Olivia's family, Kaili and her parents lives in the burbs. Kai is an athlete, having played many sports including soccer, football, golf and basketball. Their house is on a cul-de-sac with two basketball backboards across from each other. We decided that placing her Solarcan on the fence along the north side of the cul-de-sac, facing due south with one of the backboards in the foreground and one just off in the distance, would make for an interesting solargraph, one that highlighted her love of sports.
Below is an aerial view with current directions for sun rise (yellow line) and sun set (orange line) as of the summer solstice, June 21st. The thinner line represents the direction of the sun a little after solar noon that day (keeping in mind that due to daylight savings time, solar mid-day is actually 1:00pm CDT).
Installed this way, over the coming months the sun should trace arcs from left to right, from one side of the cul-de-sac to the other with their house on the west side. Each day the sun will trace an arc a little higher until we get to the summer solstice after which the arcs traced will be lower and lower.
An interesting facet of the installation of Kai's Solarcan is the basketball backboard in the foreground; see the view from the installed Solarcan below. The sun's path across the sky as we get late in the year may go just behind the backboard, outlining it in silhouette.
Of course, the backboard won't be the only thing that blocks the sun's tracks on the solargraph. Some days will be overcast, with clouds completely blocking the sun, while other days will be partly cloudy with the sun's path on the solargraph appearing with gaps during periods when the clouds are covering it.
To see the final result, now we just have to be patient!
Our plan is to leave it up until just after the winter solstice, probably taking it down and developing the image around Christmas. Once that's done, I'll post the final solargraph and what we learn from it.





.png)




.jpg)
.jpg)


.jpg)







 The journey continues beyond 2009... check it out!

